Build Notes: Forage Mat
Tangent is going to be an only pig for a while, so we’ve been looking for ways to keep him busy. Building a forage mat seemed like a good idea. The standard version - multi-color, brain-bending, bright - turns up everywhere, and we wanted ours to be unmistakably... ours. So we used the ModPig icon.

The icon lends itself well to this. It’s mostly rectangular, and simple enough to read even on a shaggy mat. The only real question was how to get the shape onto the fabric accurately.
First idea: print it on the laser printer, cut it out, trace around it. But tracing around paper is not all that accurate. Next idea: have it printed on posterboard at a print shop - that could work well because it would be sturdy and reusable, but also expensive and inconvenient.
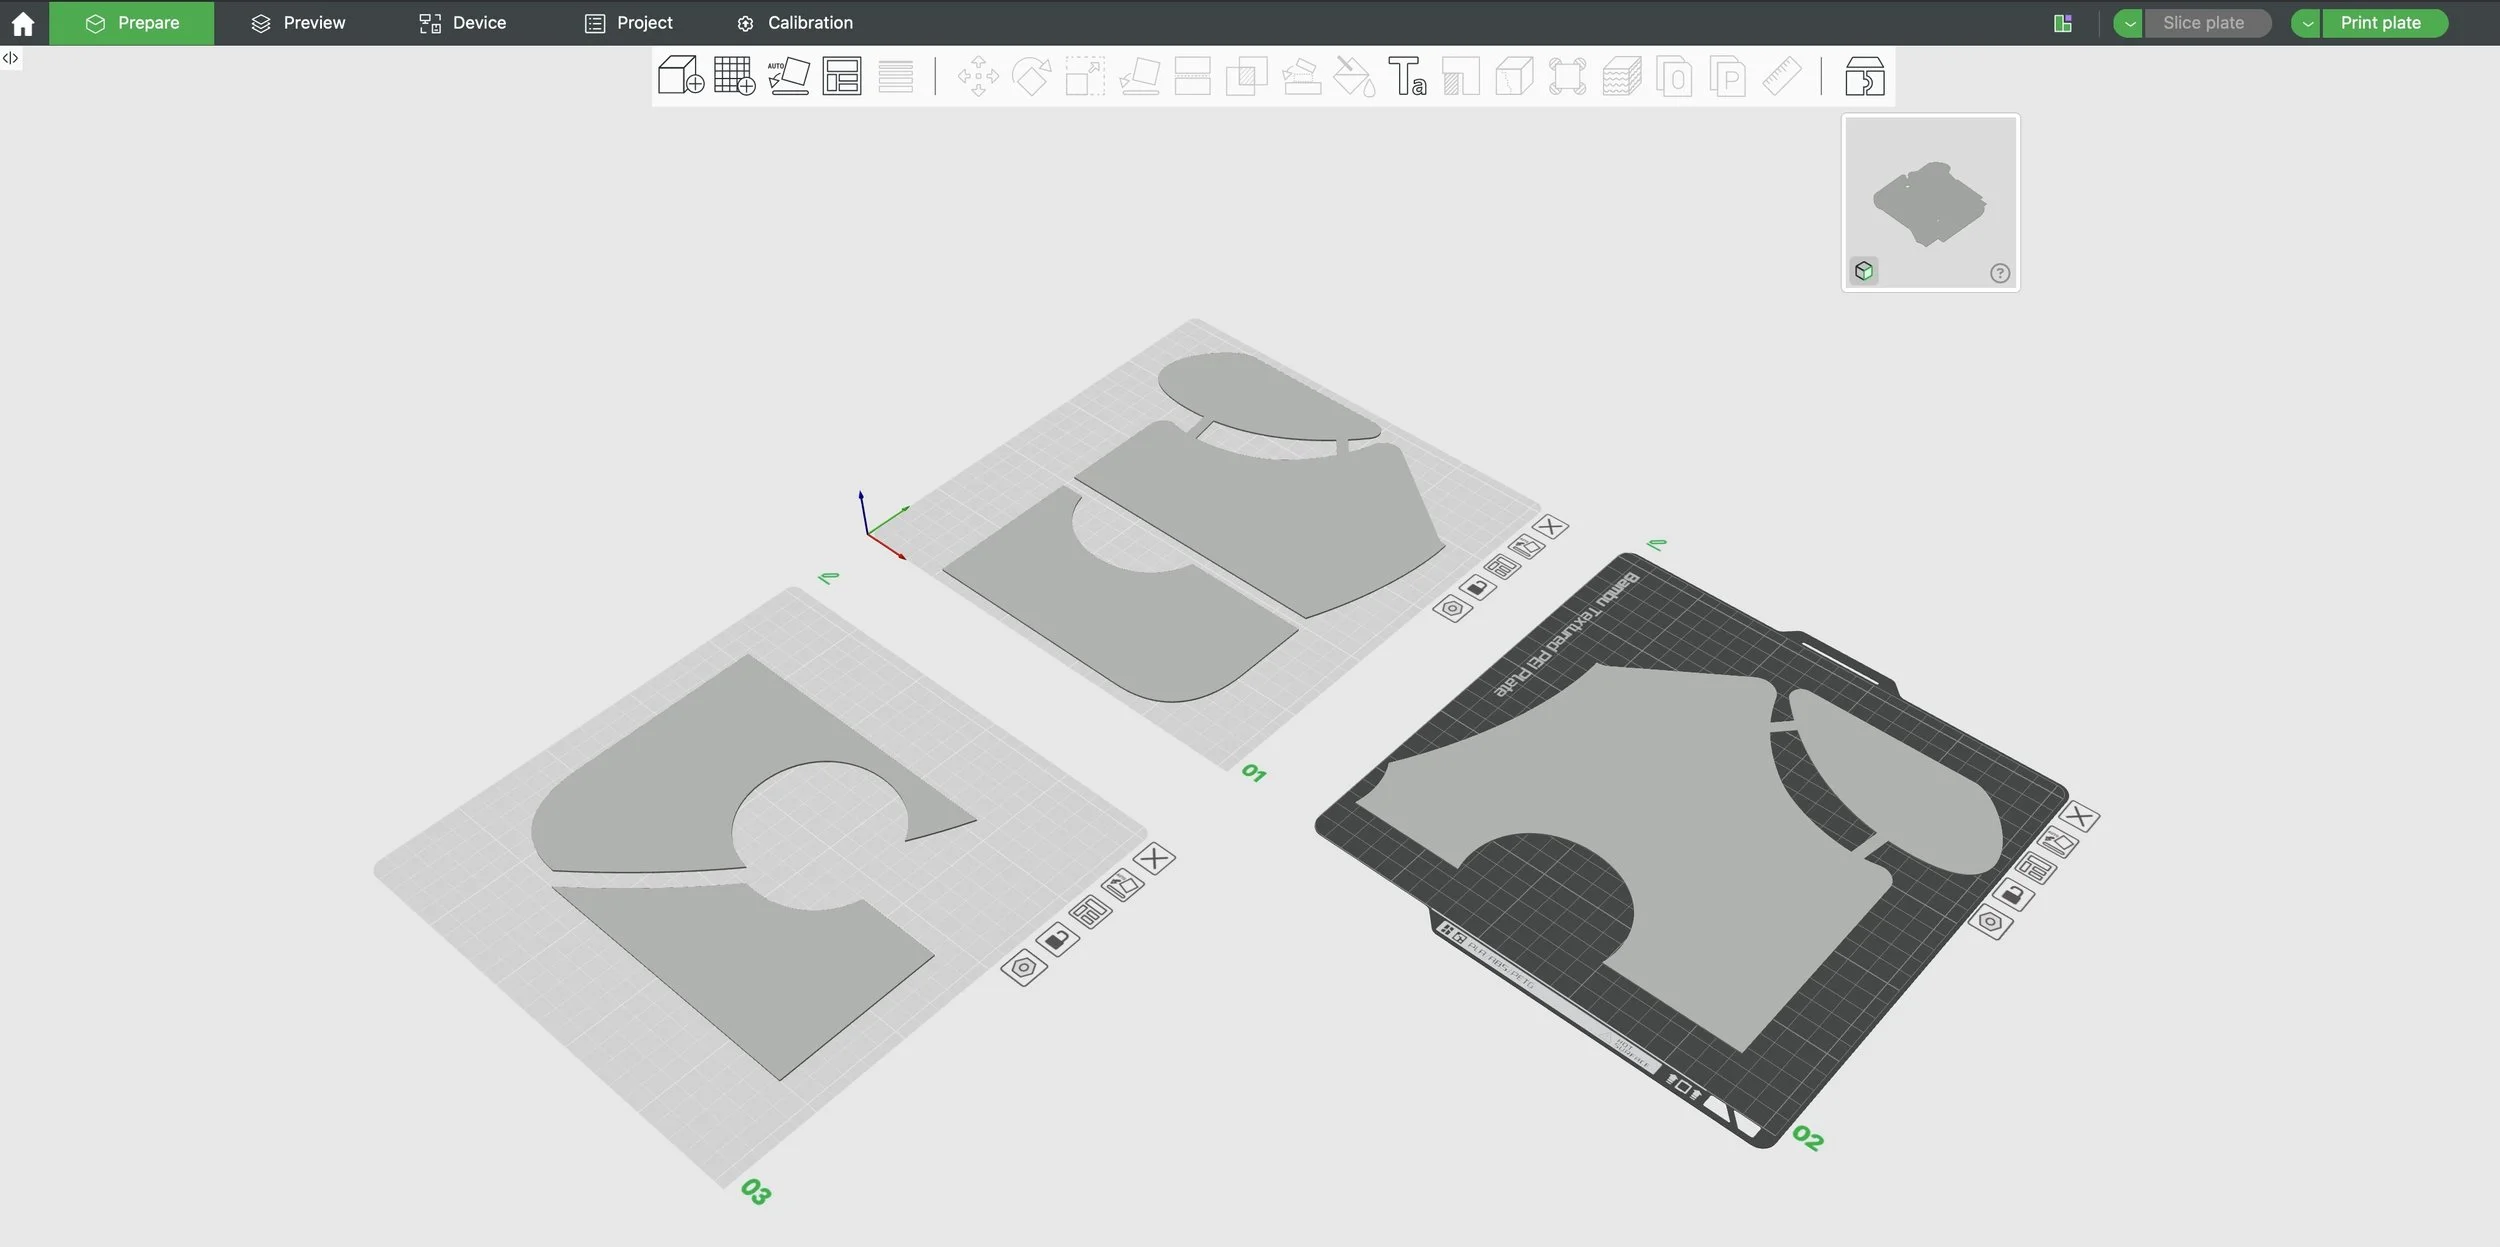
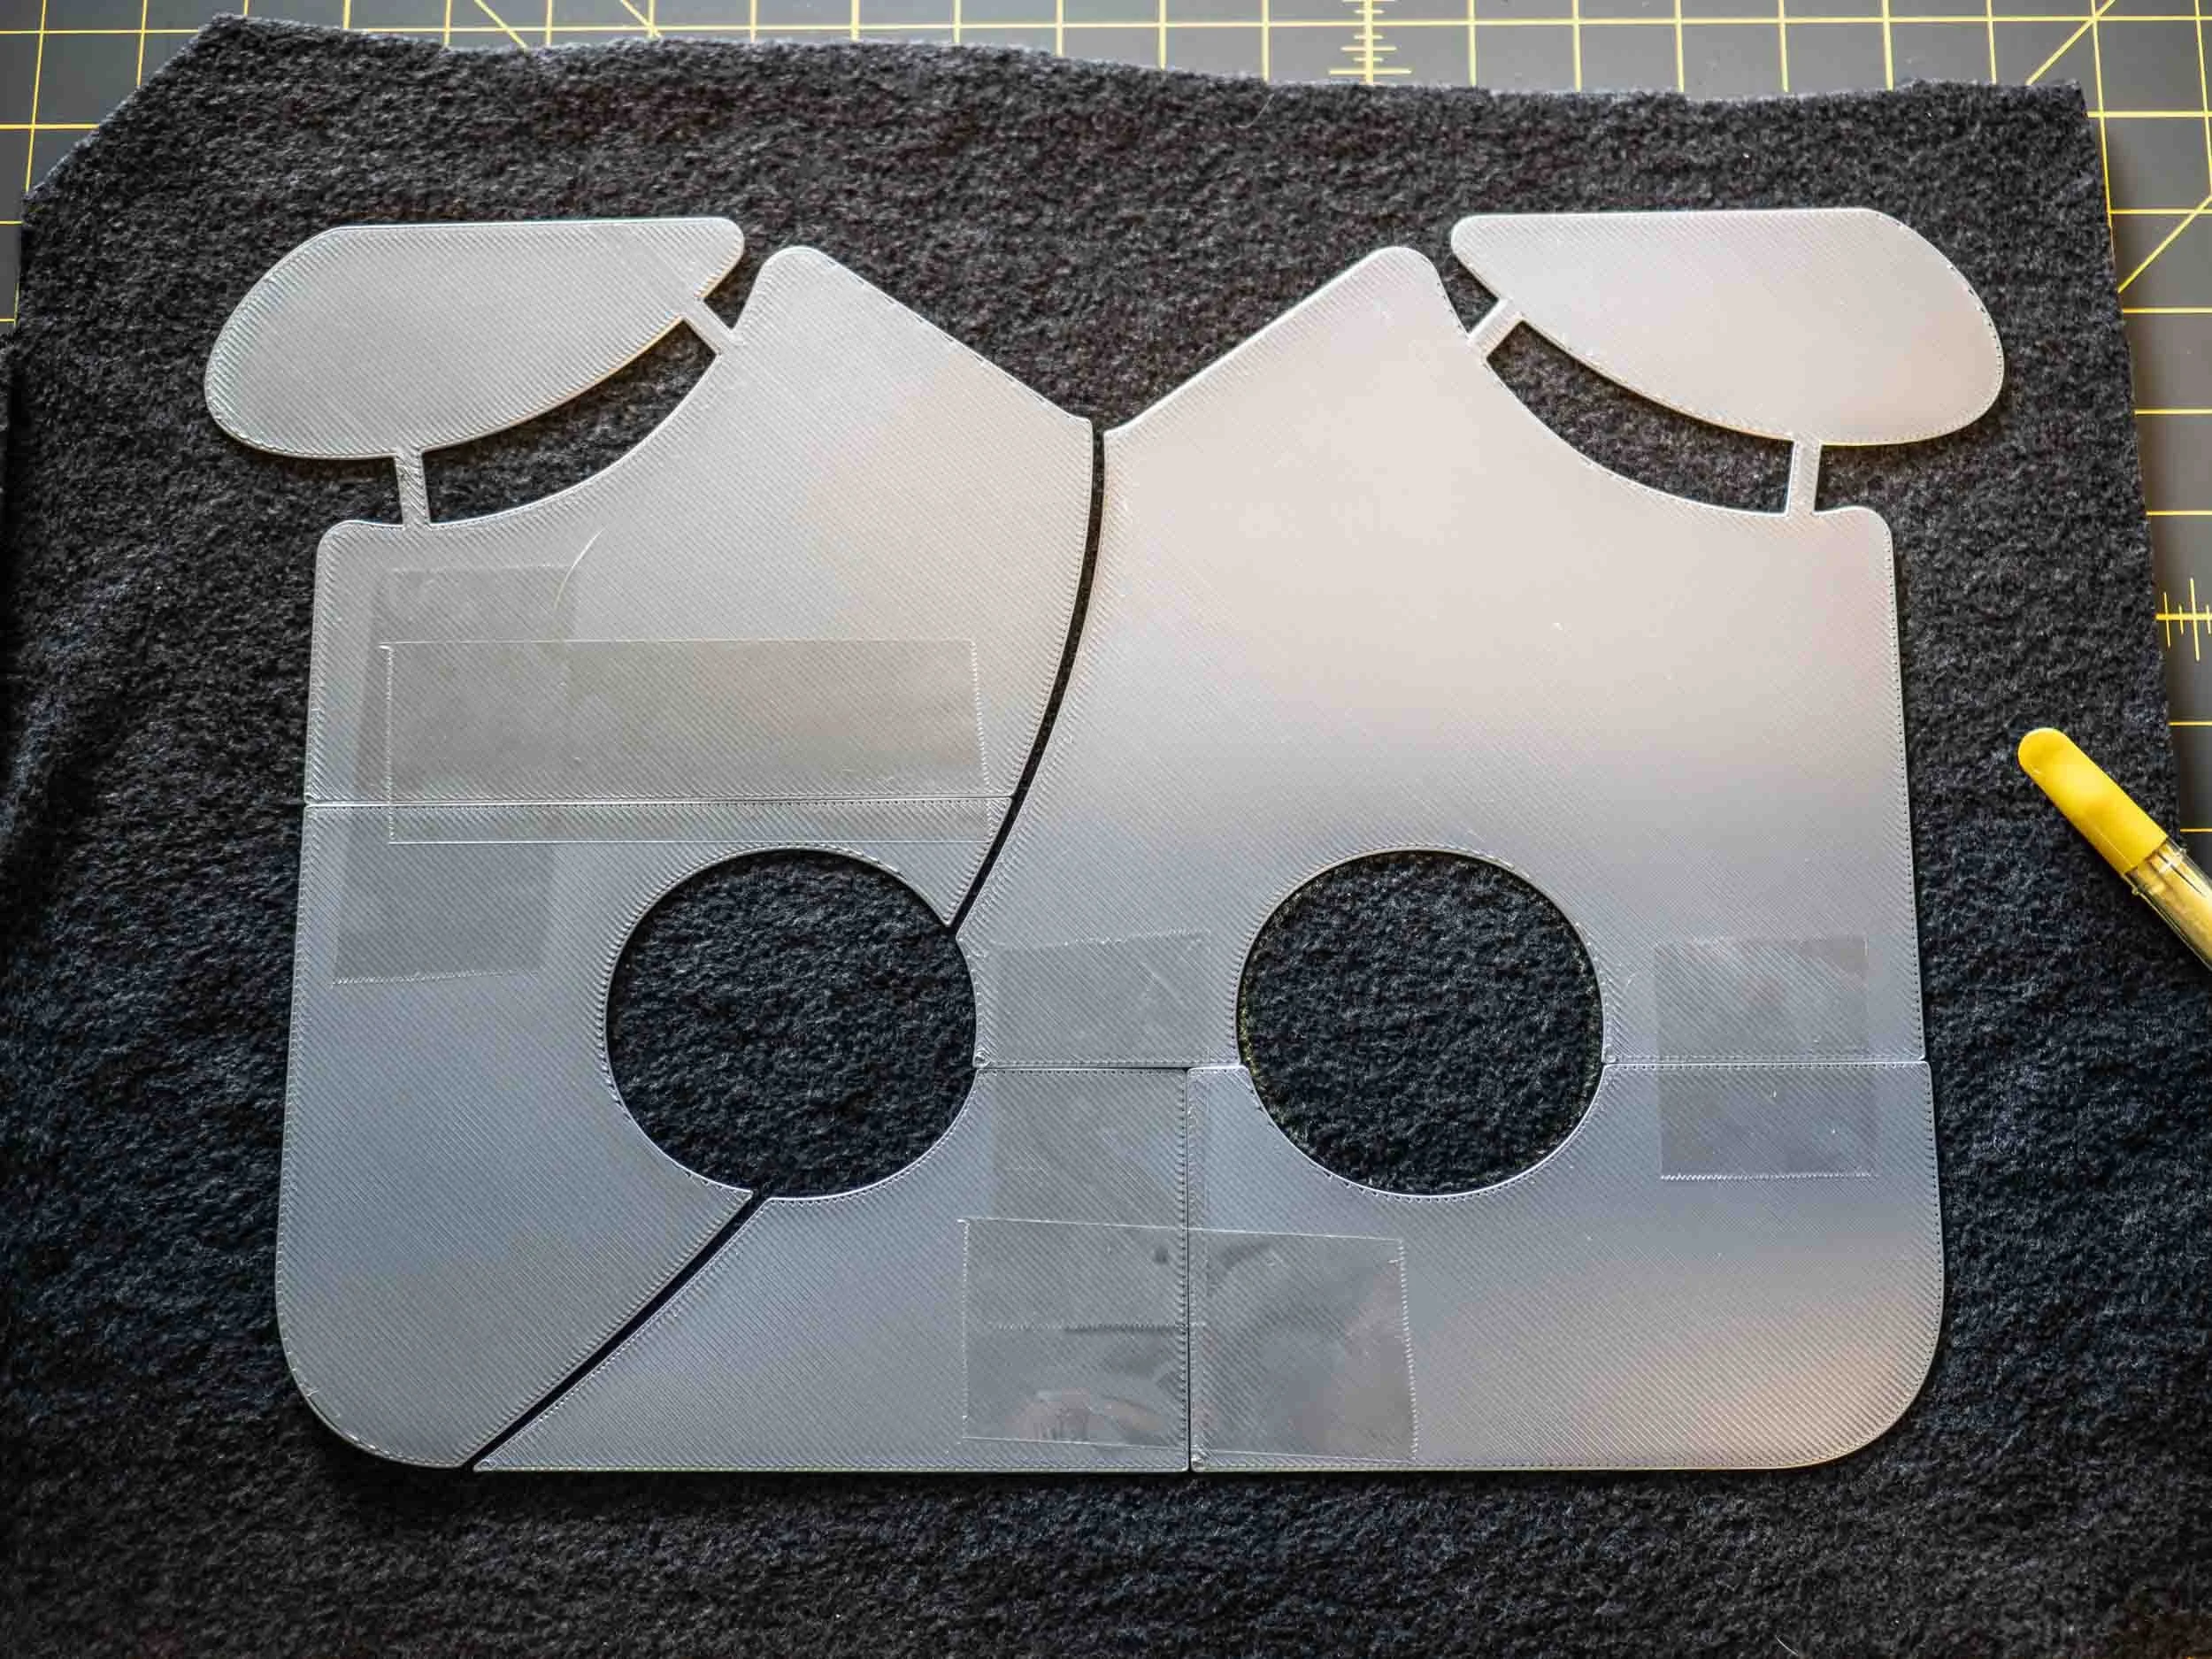
The 3D printer was the obvious answer. The only problem was that the print bed on our Bambu printer is nowhere big enough to print a 12 by 17 inch mat. Hmmm. The fix was to stop treating it as one piece: split the icon across three plates and print them separately.
The first draft was going to take an hour per plate which was more time than we wanted to spend filling our office with plastic fumes. Recently, we picked up some different printer nozzles, so we swapped the .4 nozzle for a .8 nozzle which would allow more filament to come out at a time. This halved the print time, and as a bonus, the thicker filament lines produced a pleasing ridged texture that makes it easy to grip the template.
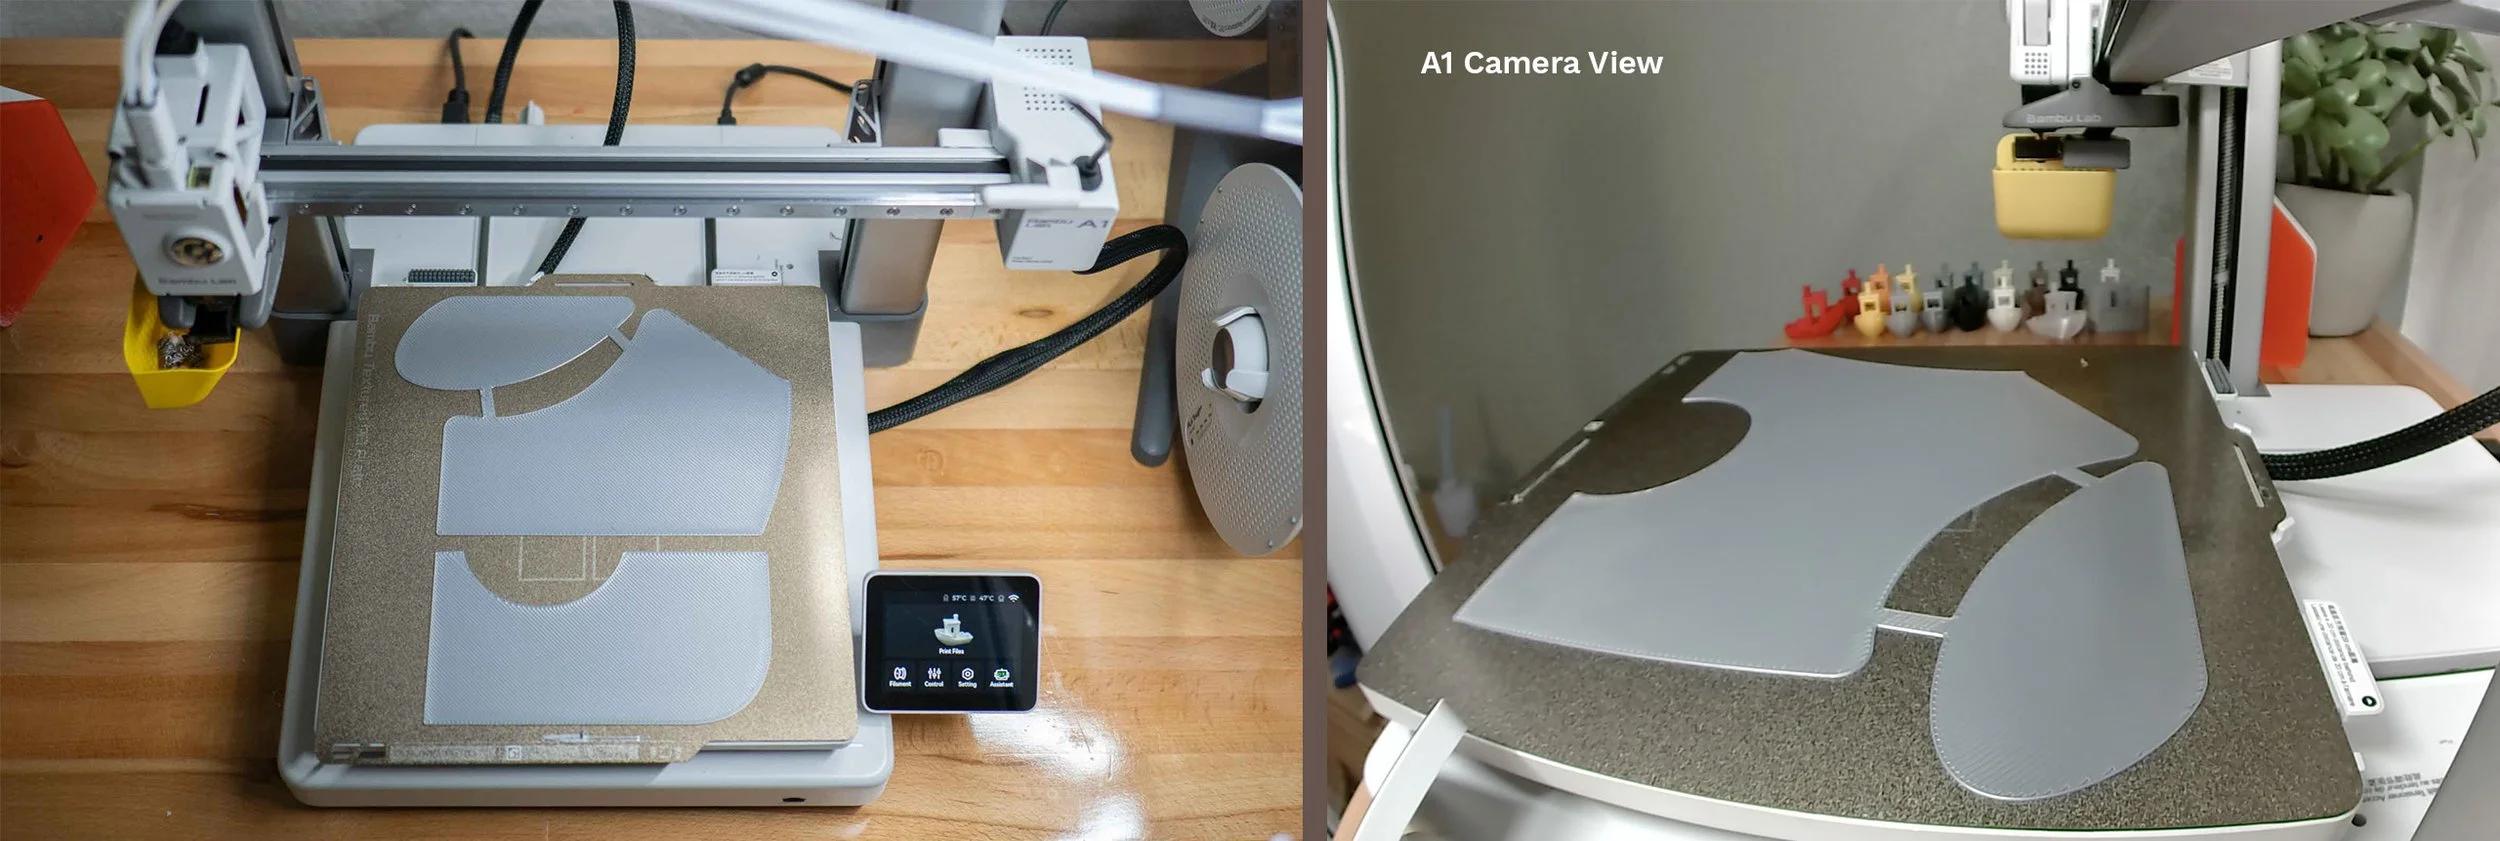
The result is a reusable template of our icon - the kind of thing that earns its shelf space. Rather than waste our good brand-colored filament on it, we opted to print it in the silver filament we still regret buying and now keep around for exactly this sort of unglamorous job.
For the mat itself, we decided to use fleece we already had - not nice enough for a waterproof mat, but perfect for a pig to bury his face in. We used the template to trace the icon.

With the base ready, we cut the fleece for the top of it into 2” strips. Each strip gets folded in half lengthwise, and sewn to the base along the fold. We started with the eyes - dark gray strips sewn in circles - then moved onto the right half of the face, following the swoop that goes through the icon. It goes quickly. After the strips were sewn, snipping the strips of fleece turns the rows into shag.
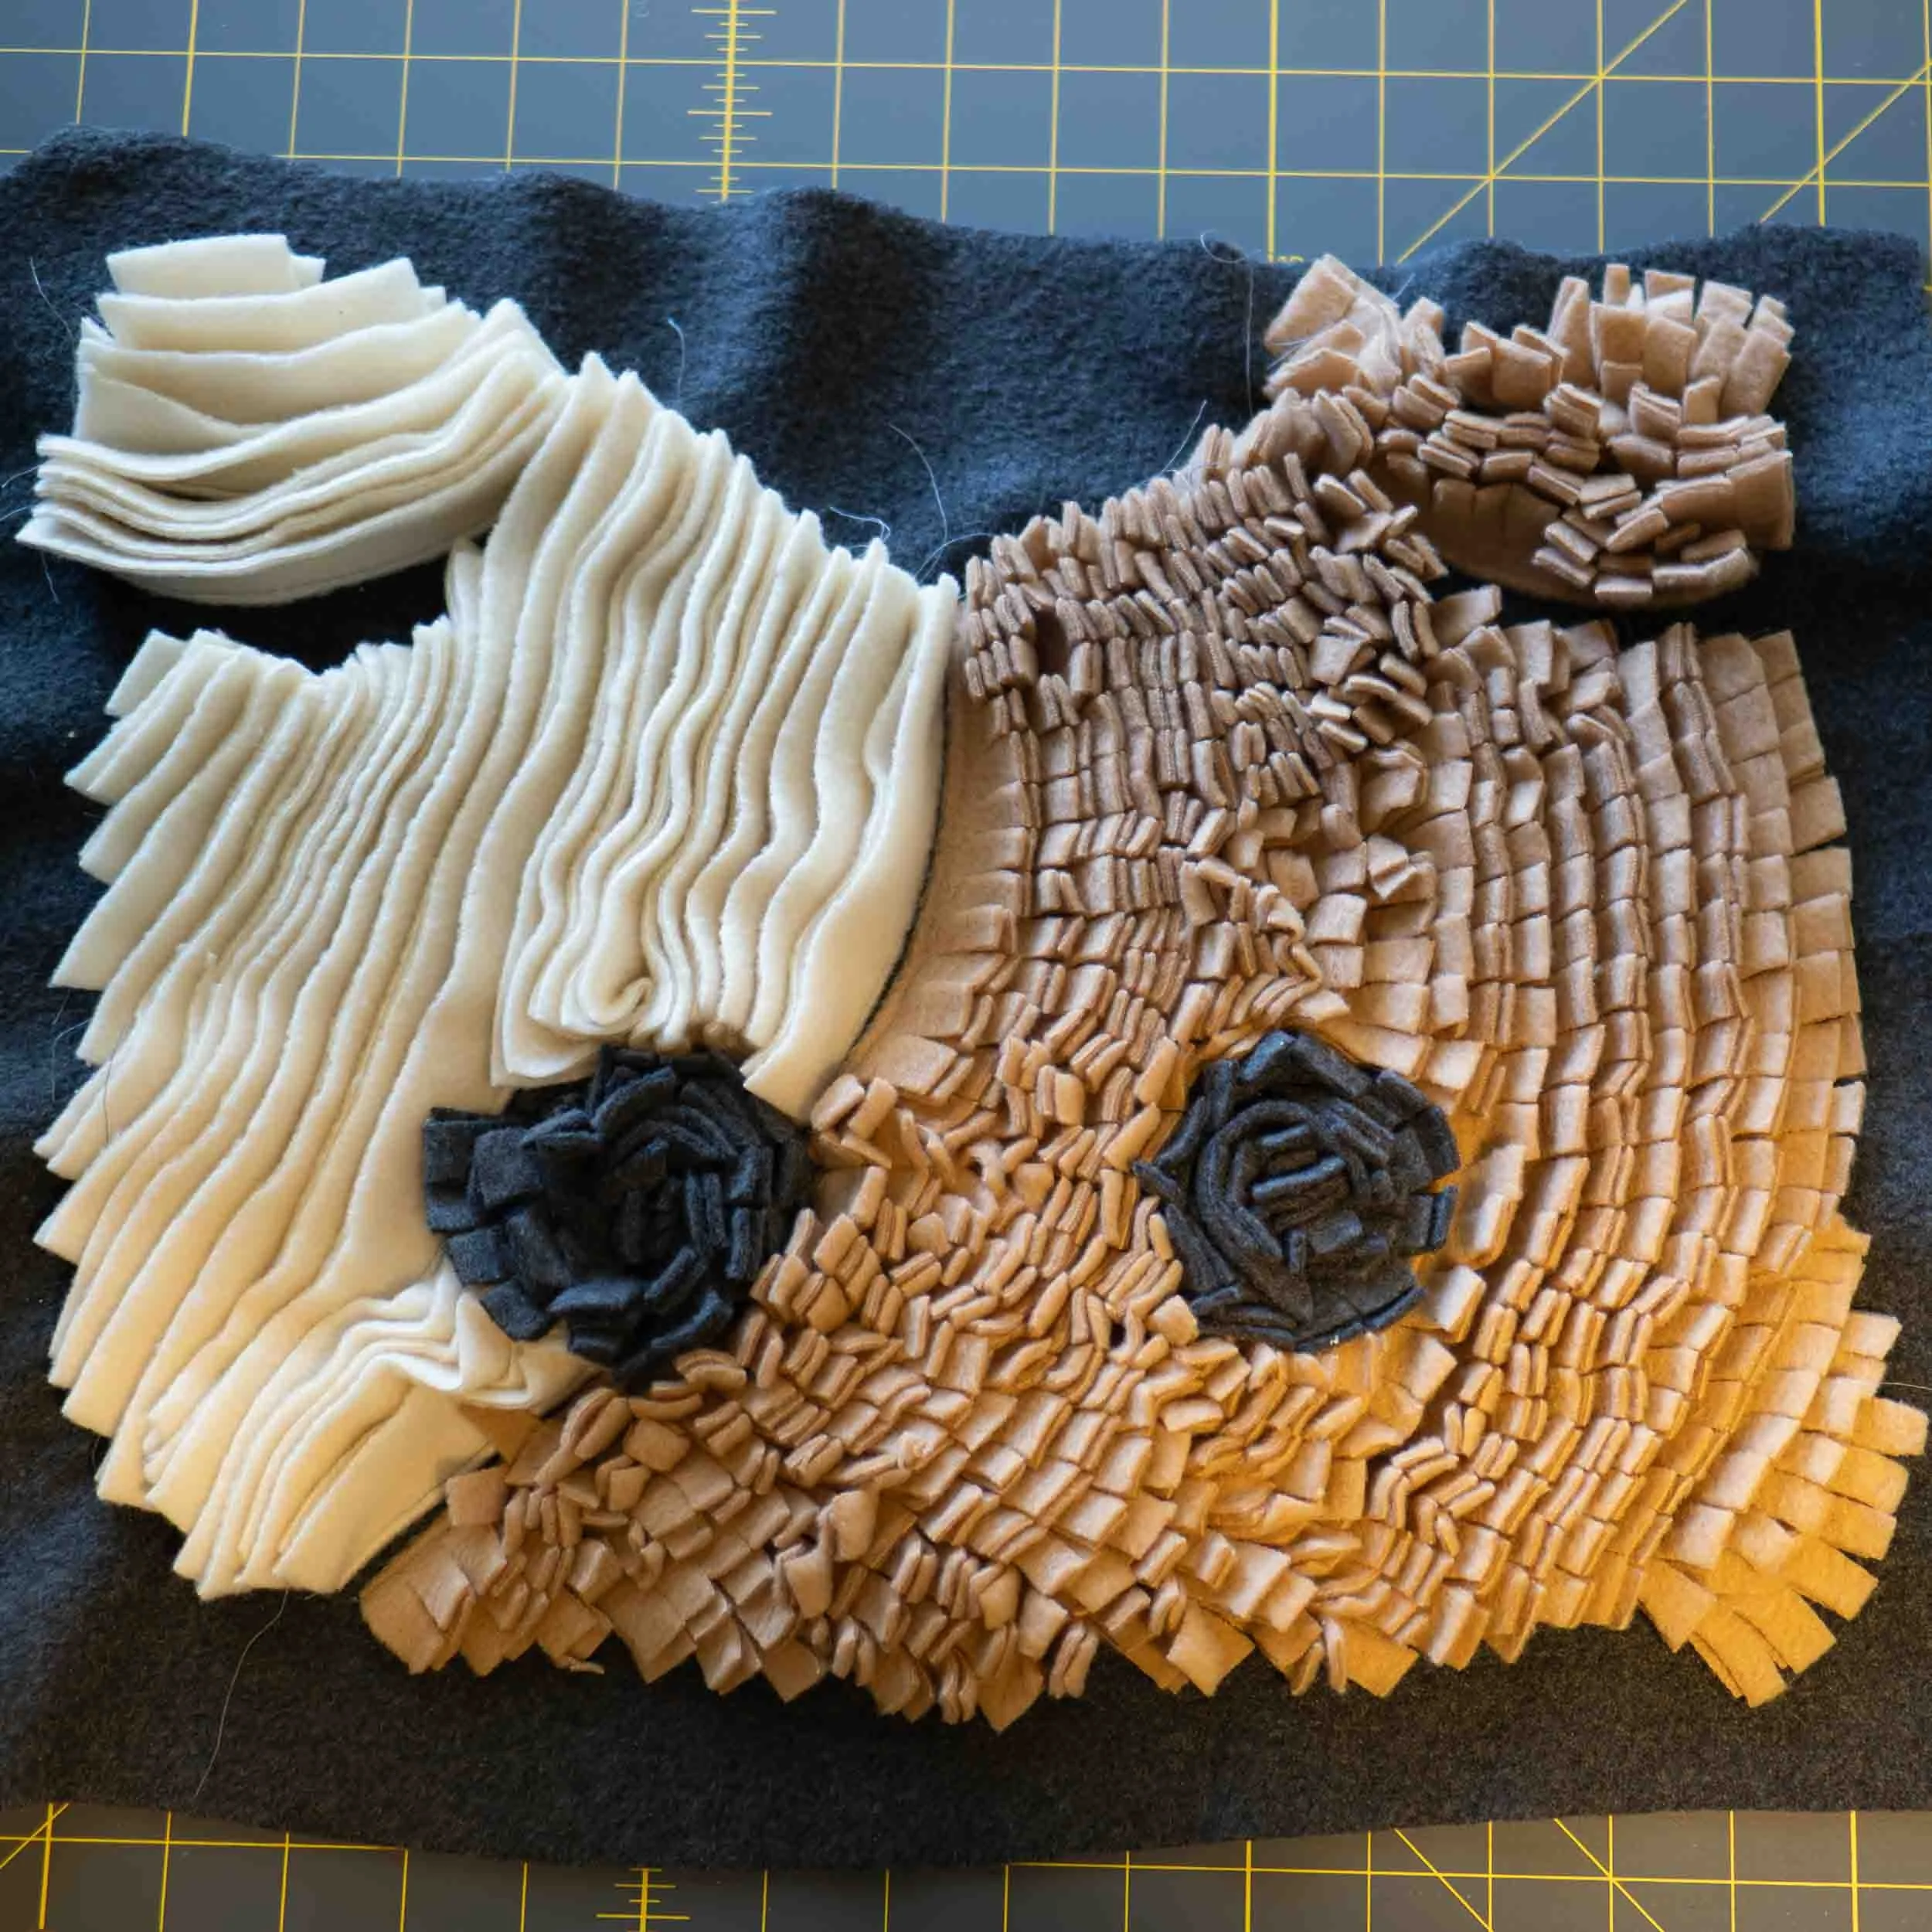
We snipped the fleece on the right side of the face right after we sewed each row, then realized it was faster to sew all the rows first and do all the snipping after. Noted for next time.
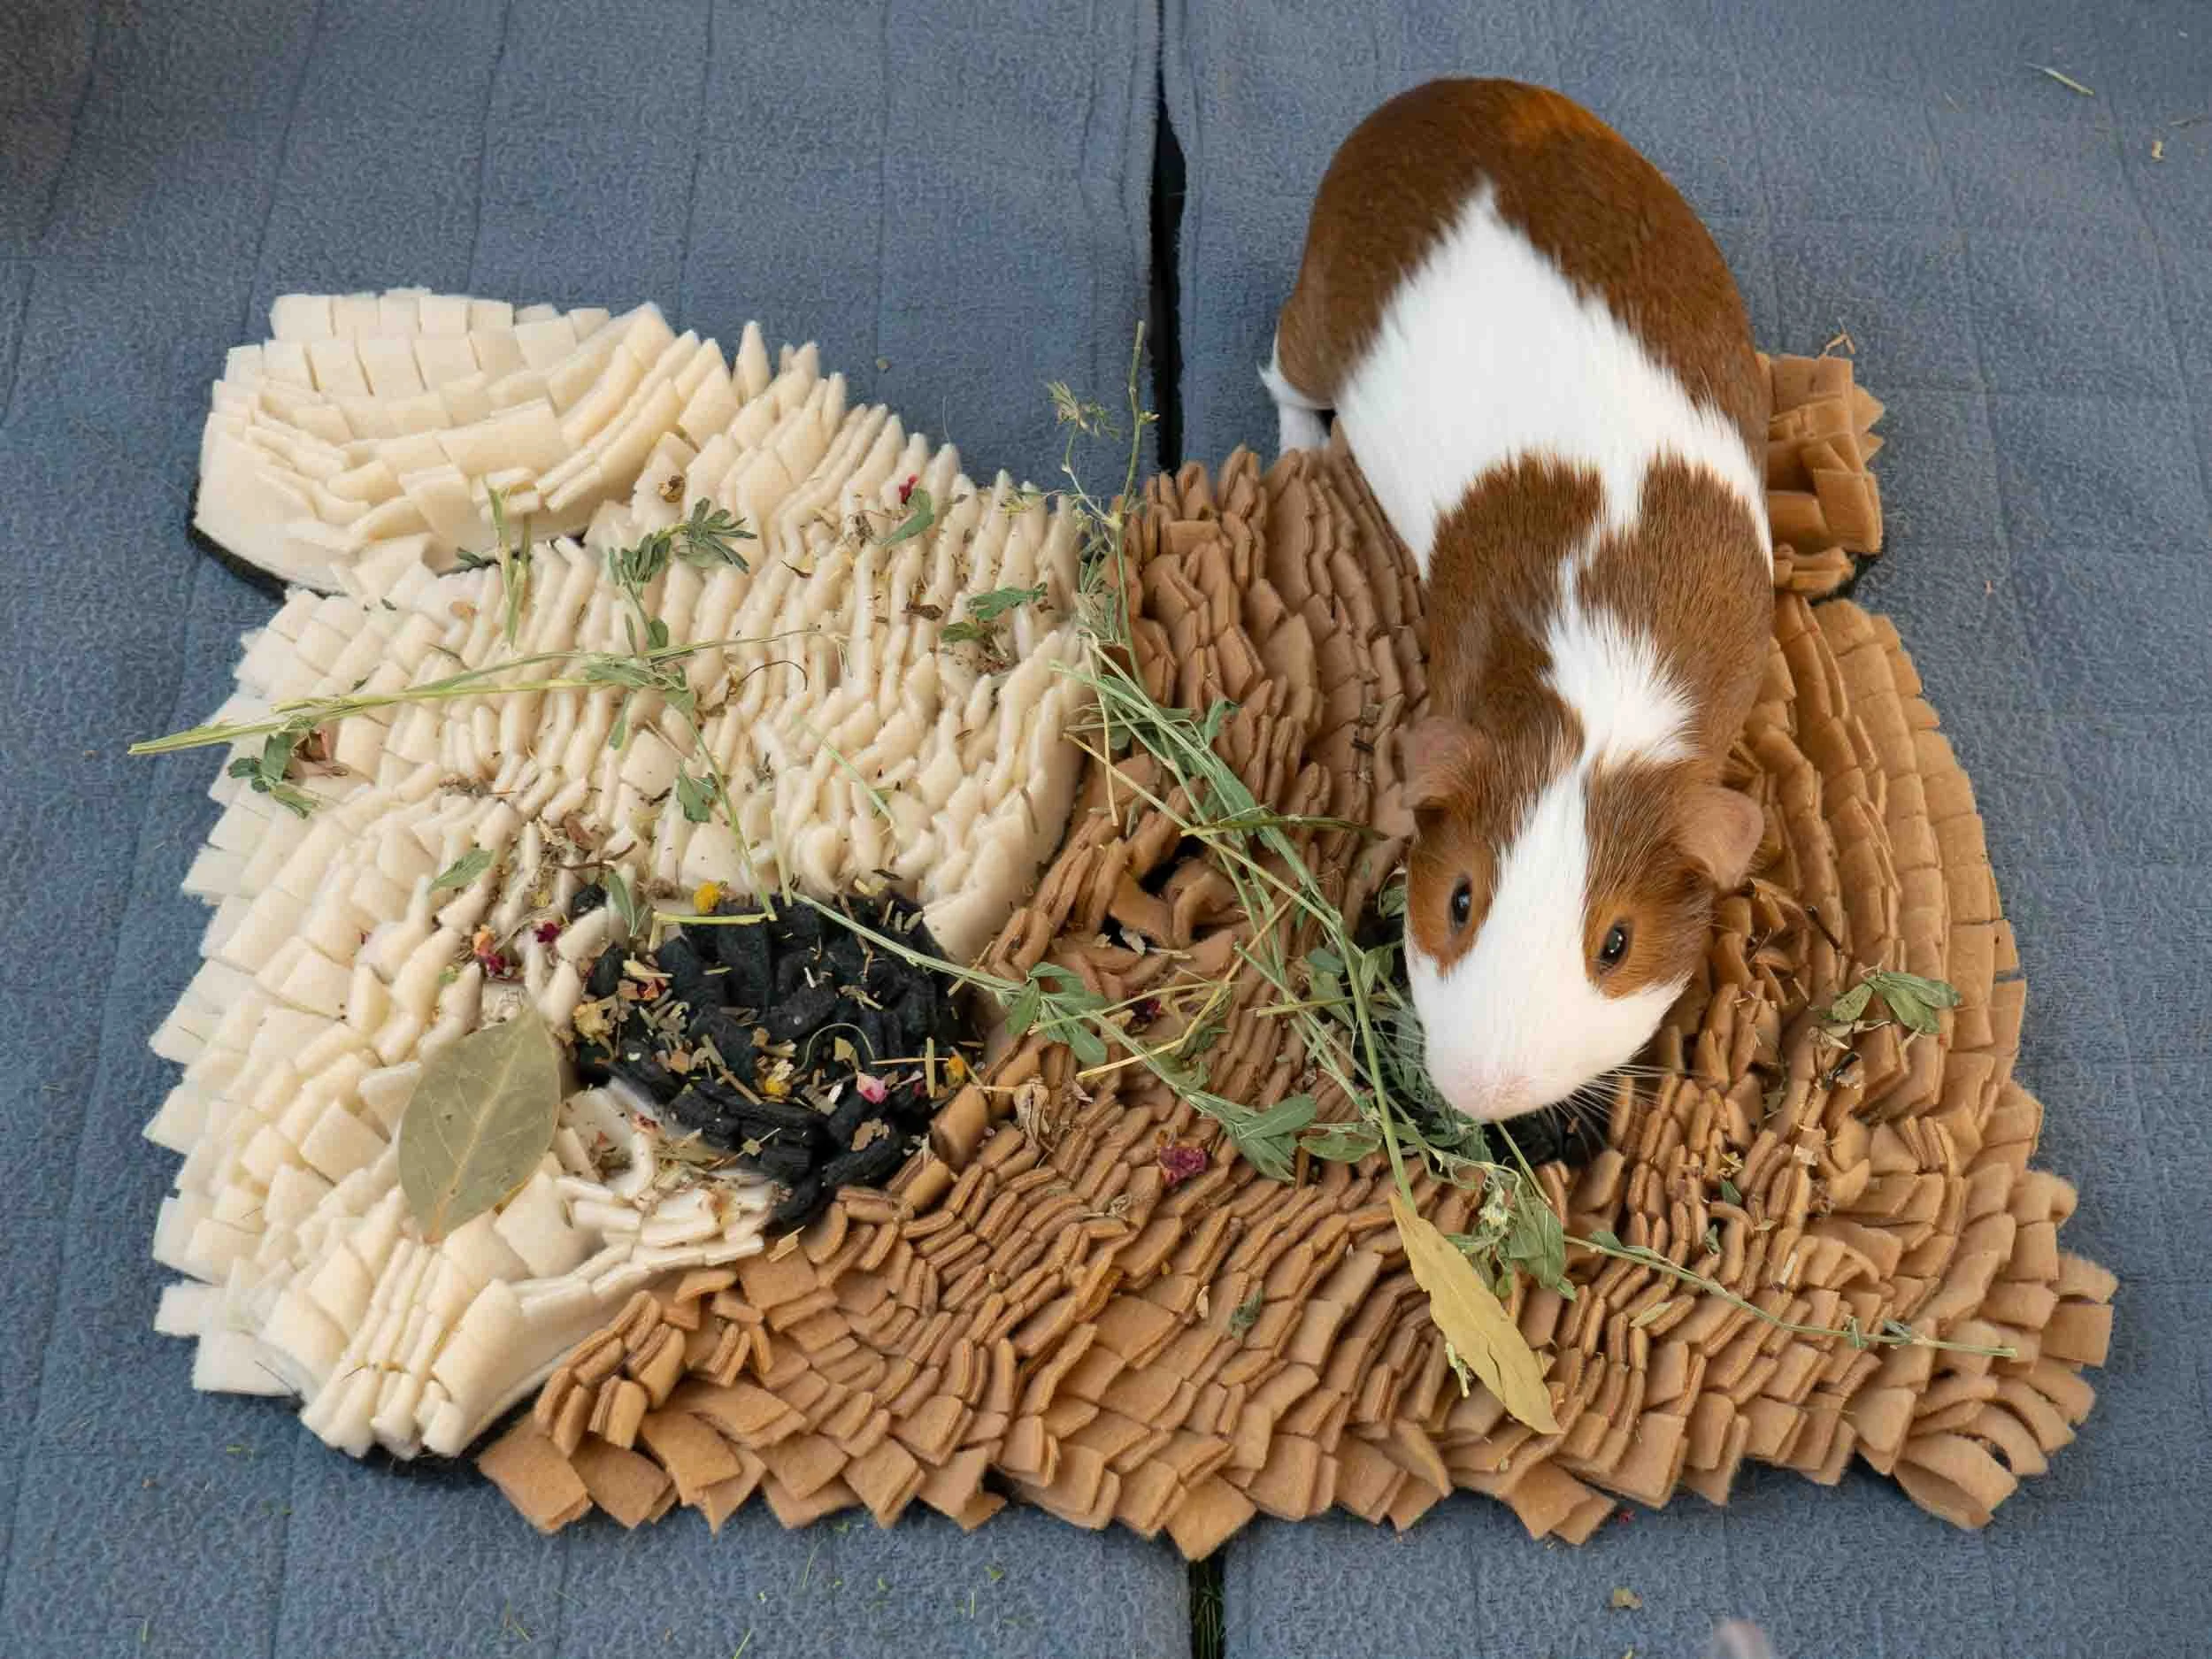
After the snipping, we cut around the outline to lose the excess fleece around the base. What’s left is a shaggy guinea pig face that reads from across the room.
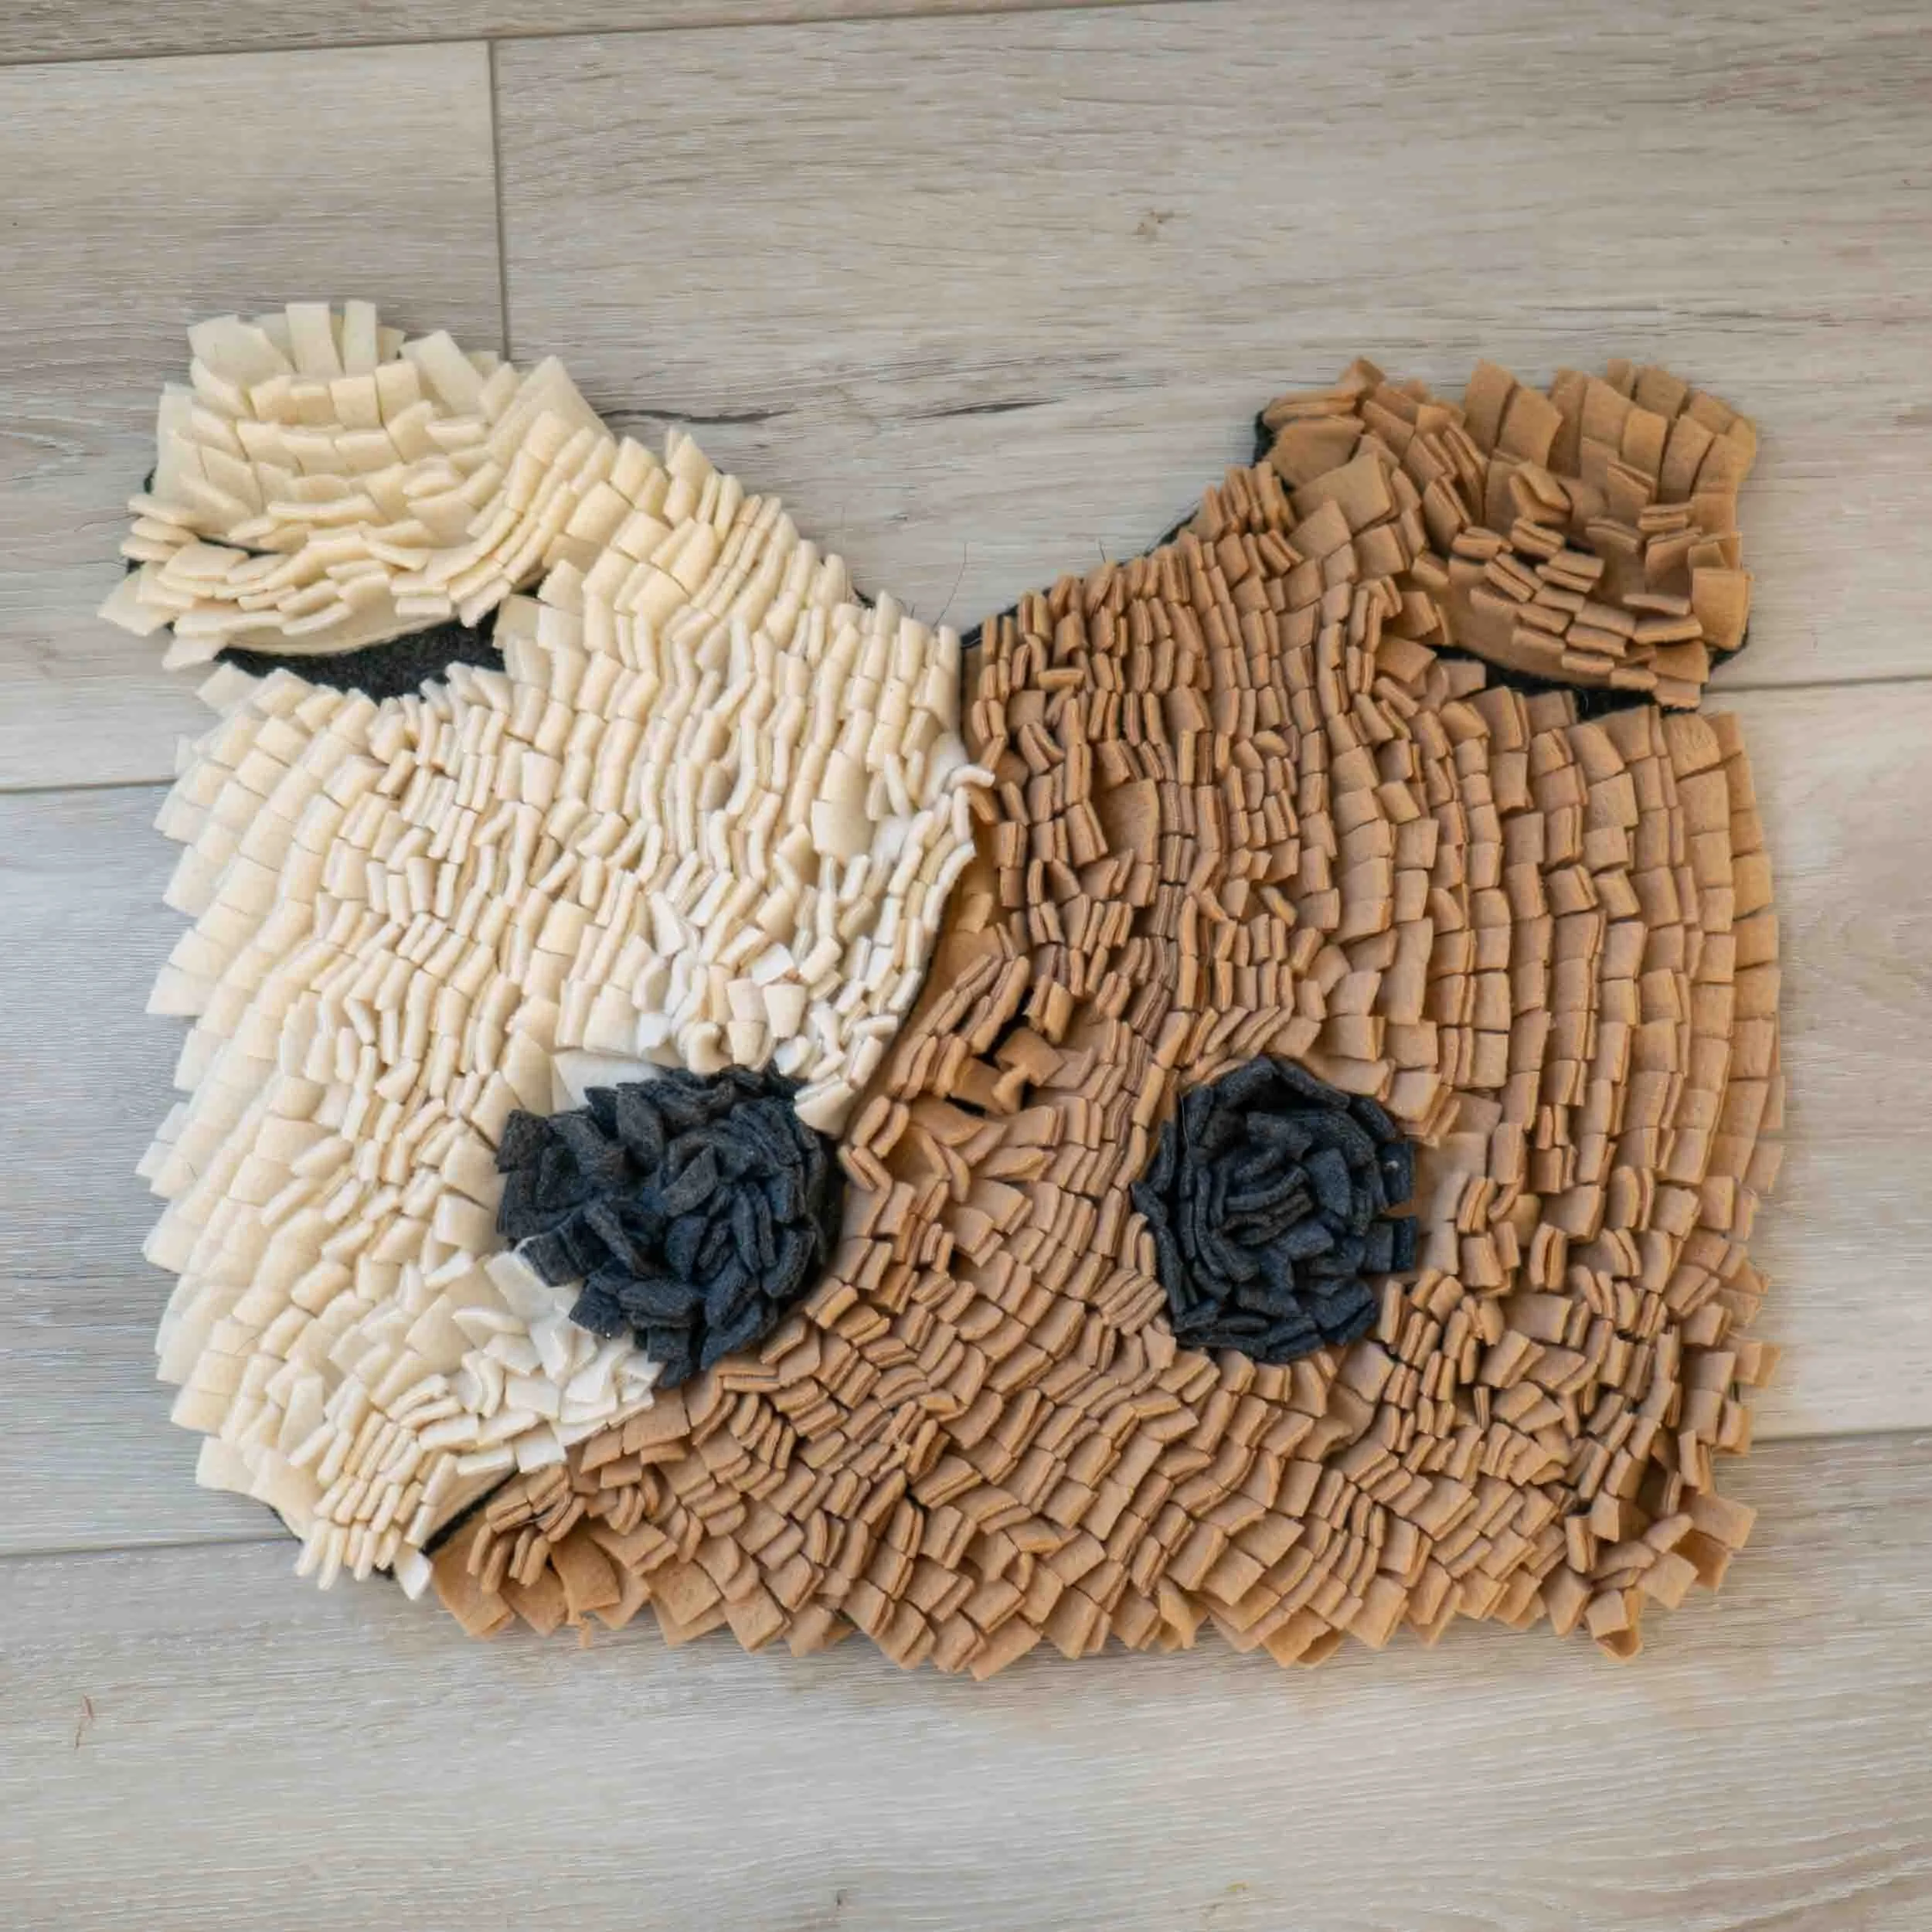
Tangent definitely seemed to approve. He went after it until he fell asleep mid-forage, woke up, and went straight back to check whether more treats had materialized while he slept. They hadn’t. He checked anyway.