Build Notes: 3D Printed Bin Tiles
A somewhat nerdy dive into how we created 3D printed tiles to go on the bins that contain all our piggie supplies. The non-nerdy version, which talks about the whole adventure, can be read about in our blog post here.
The Overall Design
To design what the tiles should look like, we used Adobe Illustrator. This is where we set our brand guide up, so it was easy to grab colors, fonts, etc. During this process, we ended up purchasing Bambu and Polychroma filaments that match up with our brand colors pretty well (Bambu doesn’t have good matches for all our colors), and that made it a lot easier to pick and choose.
We tried out a few layouts, but quickly settled on something simple - A disc with the ModPig icon and some text on it.
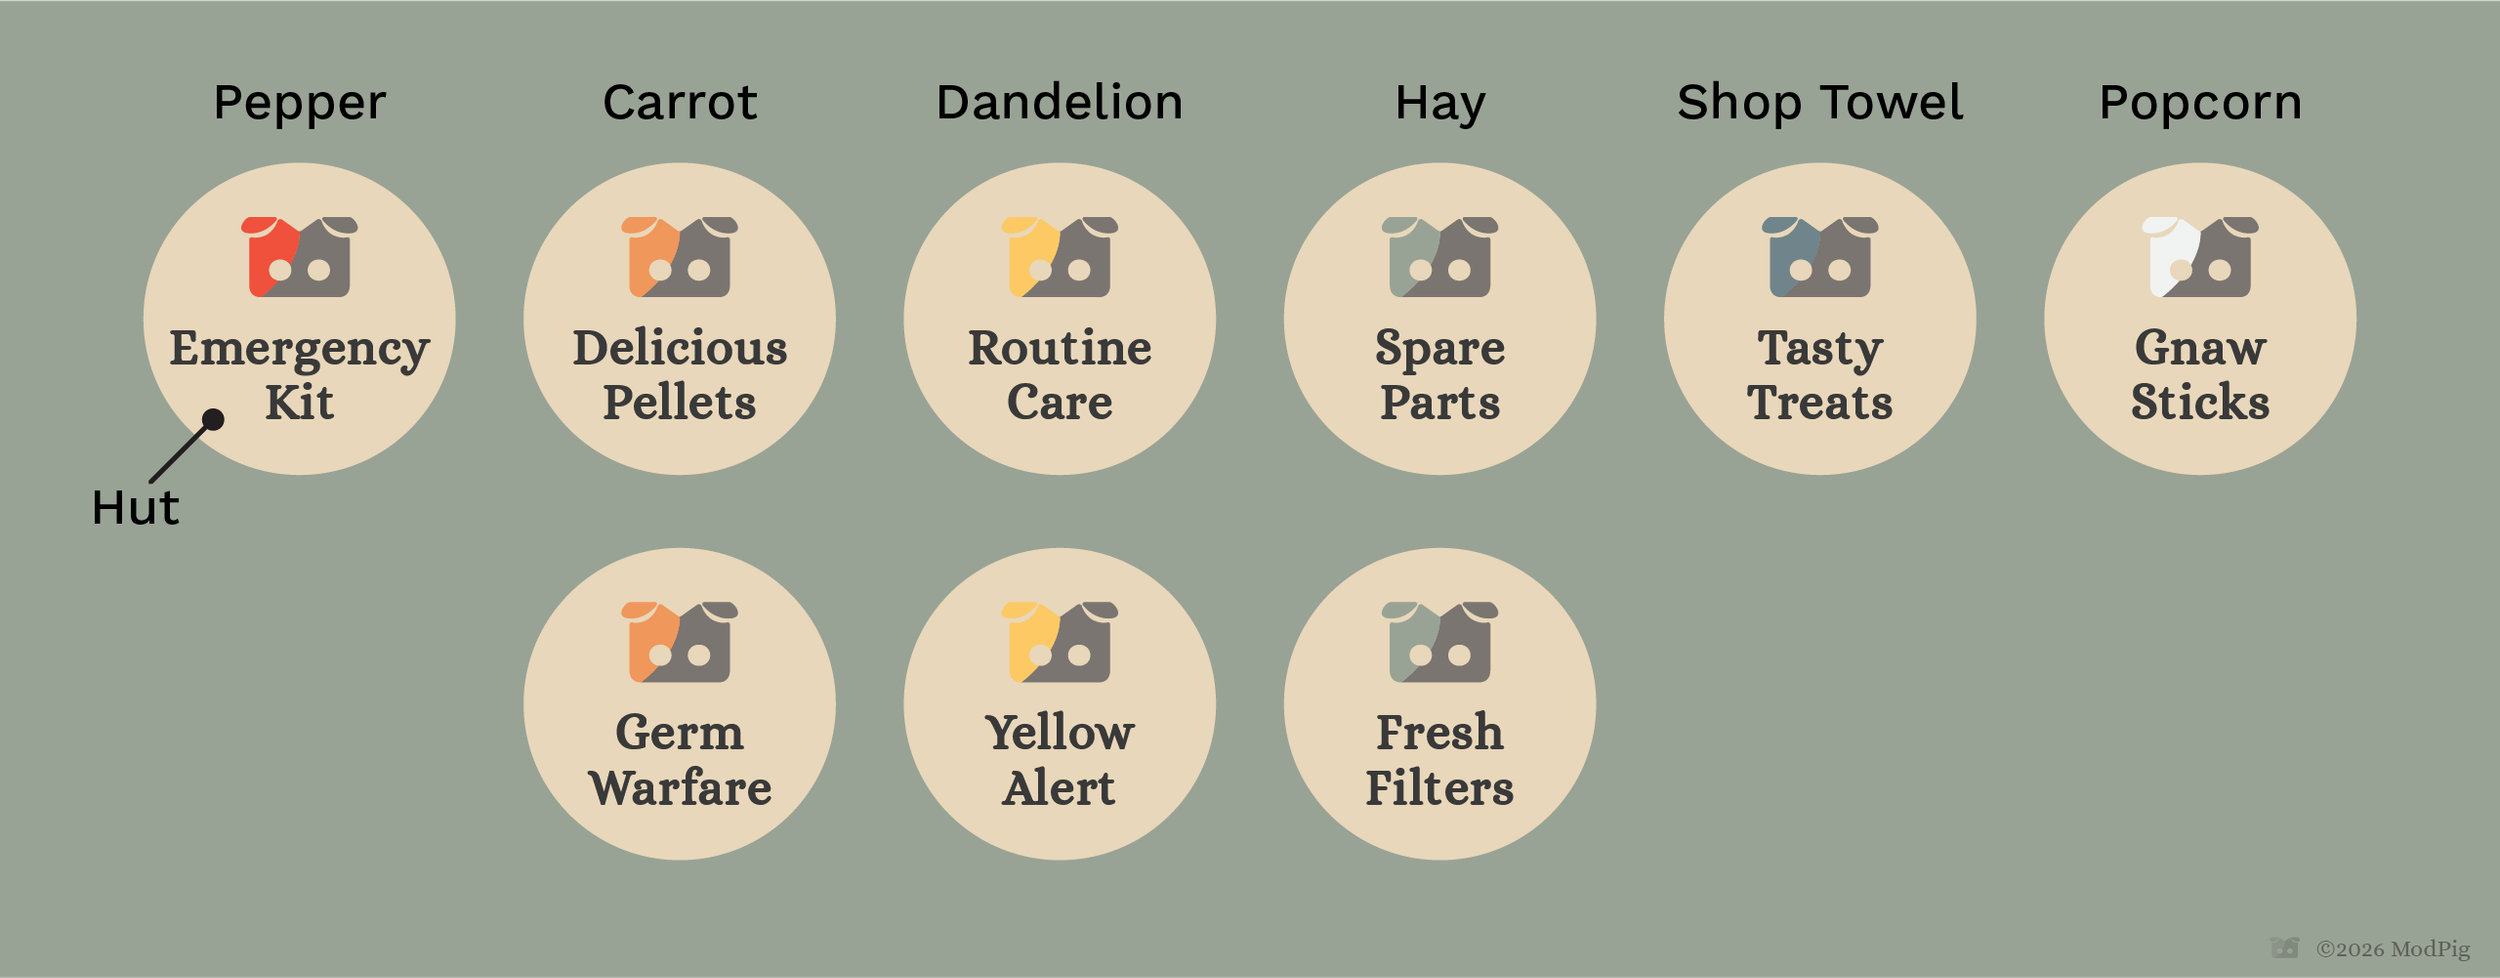
We wanted cohesiveness, so using the same filament for the base of the disc was a must - we chose the wood fill Bambu filament because it’s a nice natural looking neutral that the logo and text would stand out on. It’s also close to our brand color Hut (beige). After a few iterations, we decided that we’d keep the main part of the icon Burrow (dark brown), and the text Pellet (charcoal gray). The only variable would be the accent, which we could pick from Pepper (red), Carrot (orange), Dandelion (yellow), Hay (green), Shop Towel (blue), and Popcorn (off-white).
The icon is 2-color, so we could swap filaments to get a few different options for logo colors for each one. We decided that Emergency Kit and Yellow Alert needed specific colors, but the rest we could just randomly assign.
Design For 3D
There are certain things we had to decide on for the best possible print. Some of these were technical issues, others were design preferences.
Font
The font we settled on in Squarespace for our headers and display text is Alice, but unfortunately that only comes in one weight. Our body copy is Work Sans, and that’s way too boring for something like this.
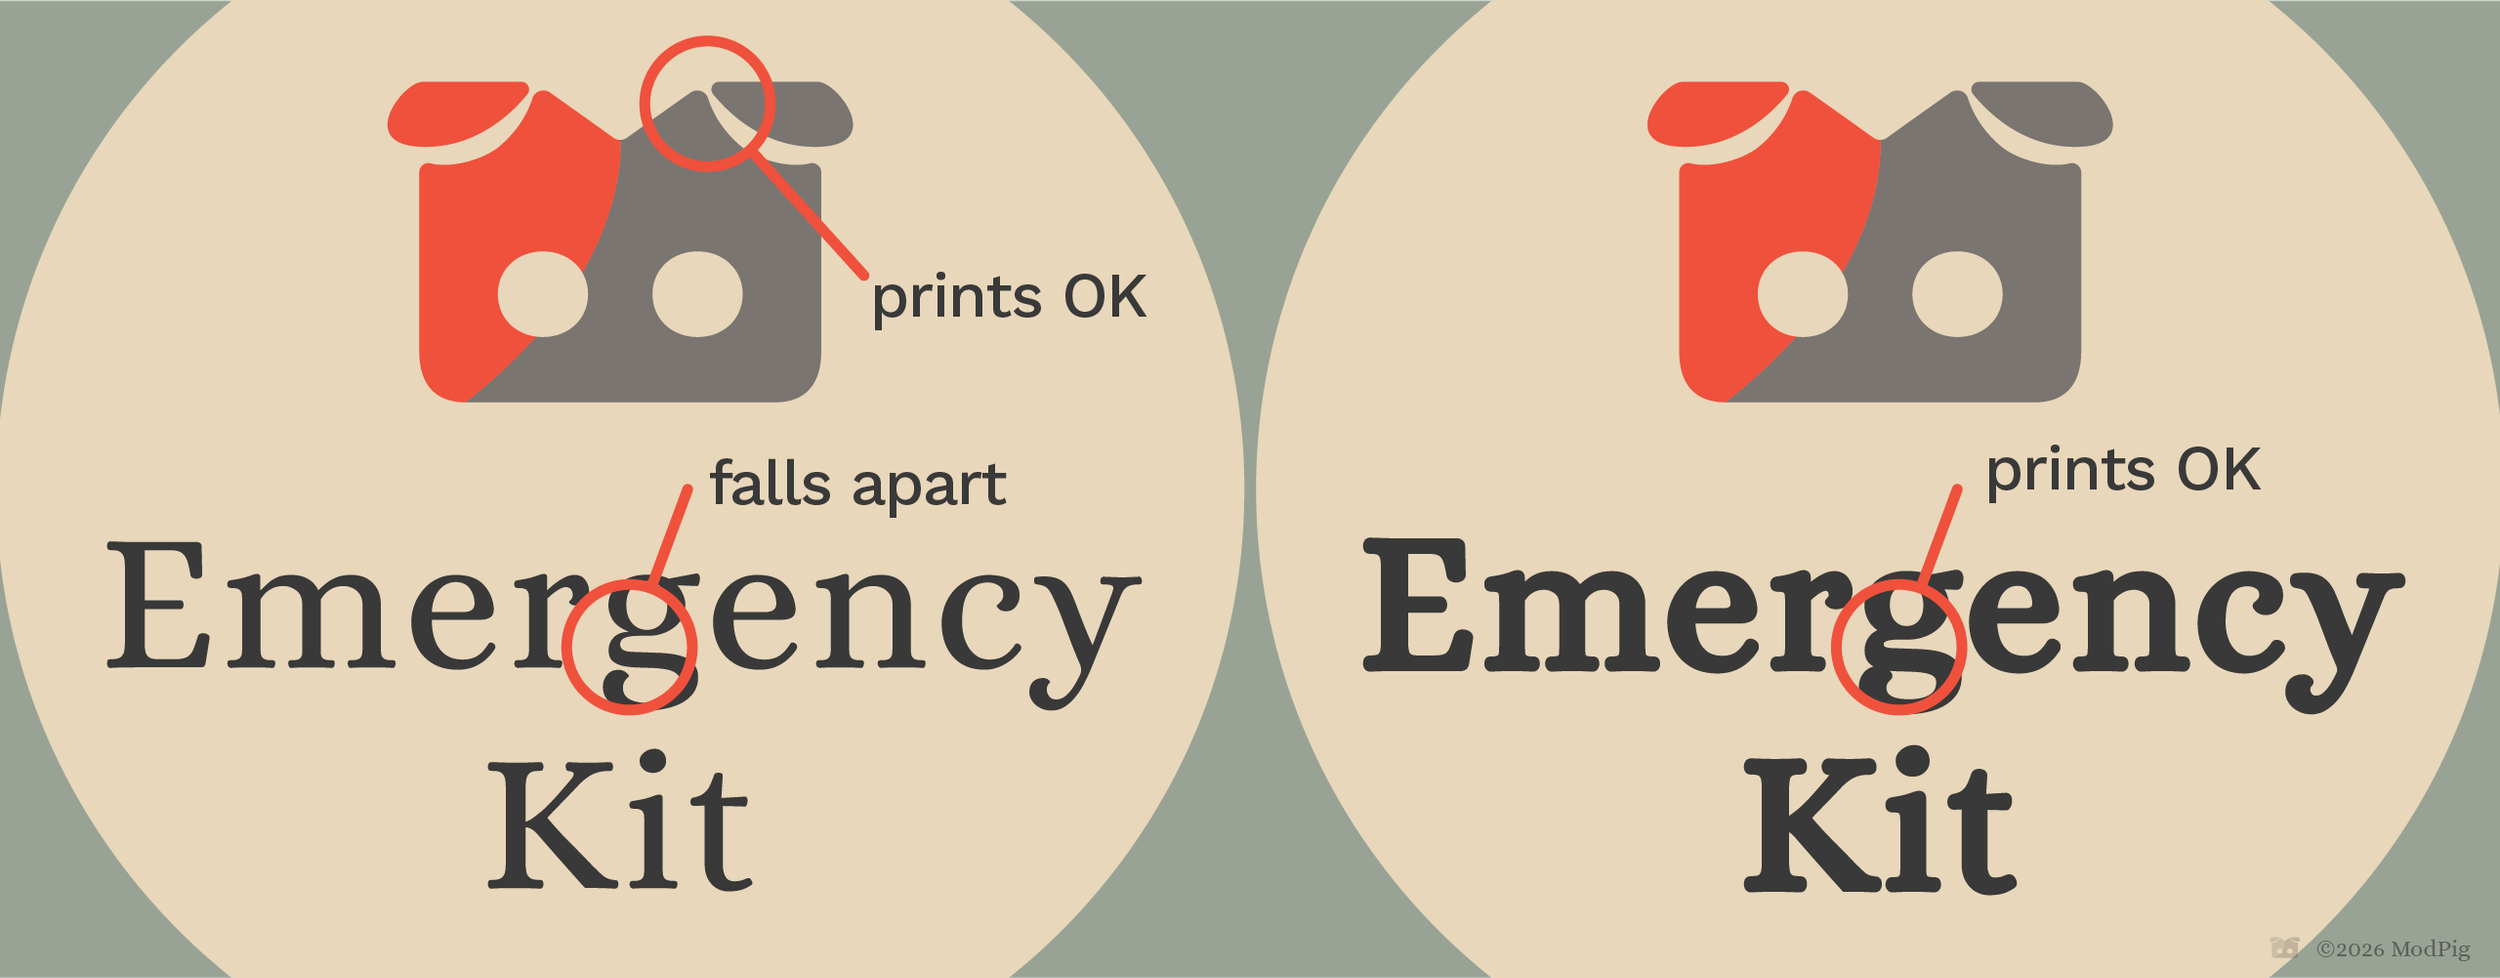
From experience, we knew that something with very thin parts of the text wouldn’t print well, and we confirmed that with a test print. We tried out a few other fonts, but none of them seemed right, so we broke one of the cardinal typography rules and… ugh… faux bolded it (added a stroke around the letters).
Sizing Of Objects
For the same reason the type started falling apart when it got too thin, the ears around our icon were also going to present a problem unless we made them large enough. Fortunately we just had to enlarge the icon a bit rather than make a special version. This also informed the size of the placard itself (75mm diameter) - as large as possible to ensure the text looks nice, but not too large for the container it goes on.
2mm seemed like a good thickness - enough to give a little dimension, and it divided nicely in to 10 layers of 0.2mm each (standard quality for our printer).
Going Native In Bambu
How were we going to make the print file exactly? First thought was to build it in CAD (Plasticity), but it quickly became obvious that swapping out text to make a new tile would be a thing, so we looked into doing it natively in Bambu Studio. This ended up working, but it took some doing.
The Disc
Dropping in the disc itself was easy. Bambu has the ability to put in a cylinder primitive, so we dropped in a 75mm x 75mm x 2mm disc. At this point we figured it’d be a quick 15 minutes and we’d be ready to print.
Yeah, not how it went down.
The Icon And Text
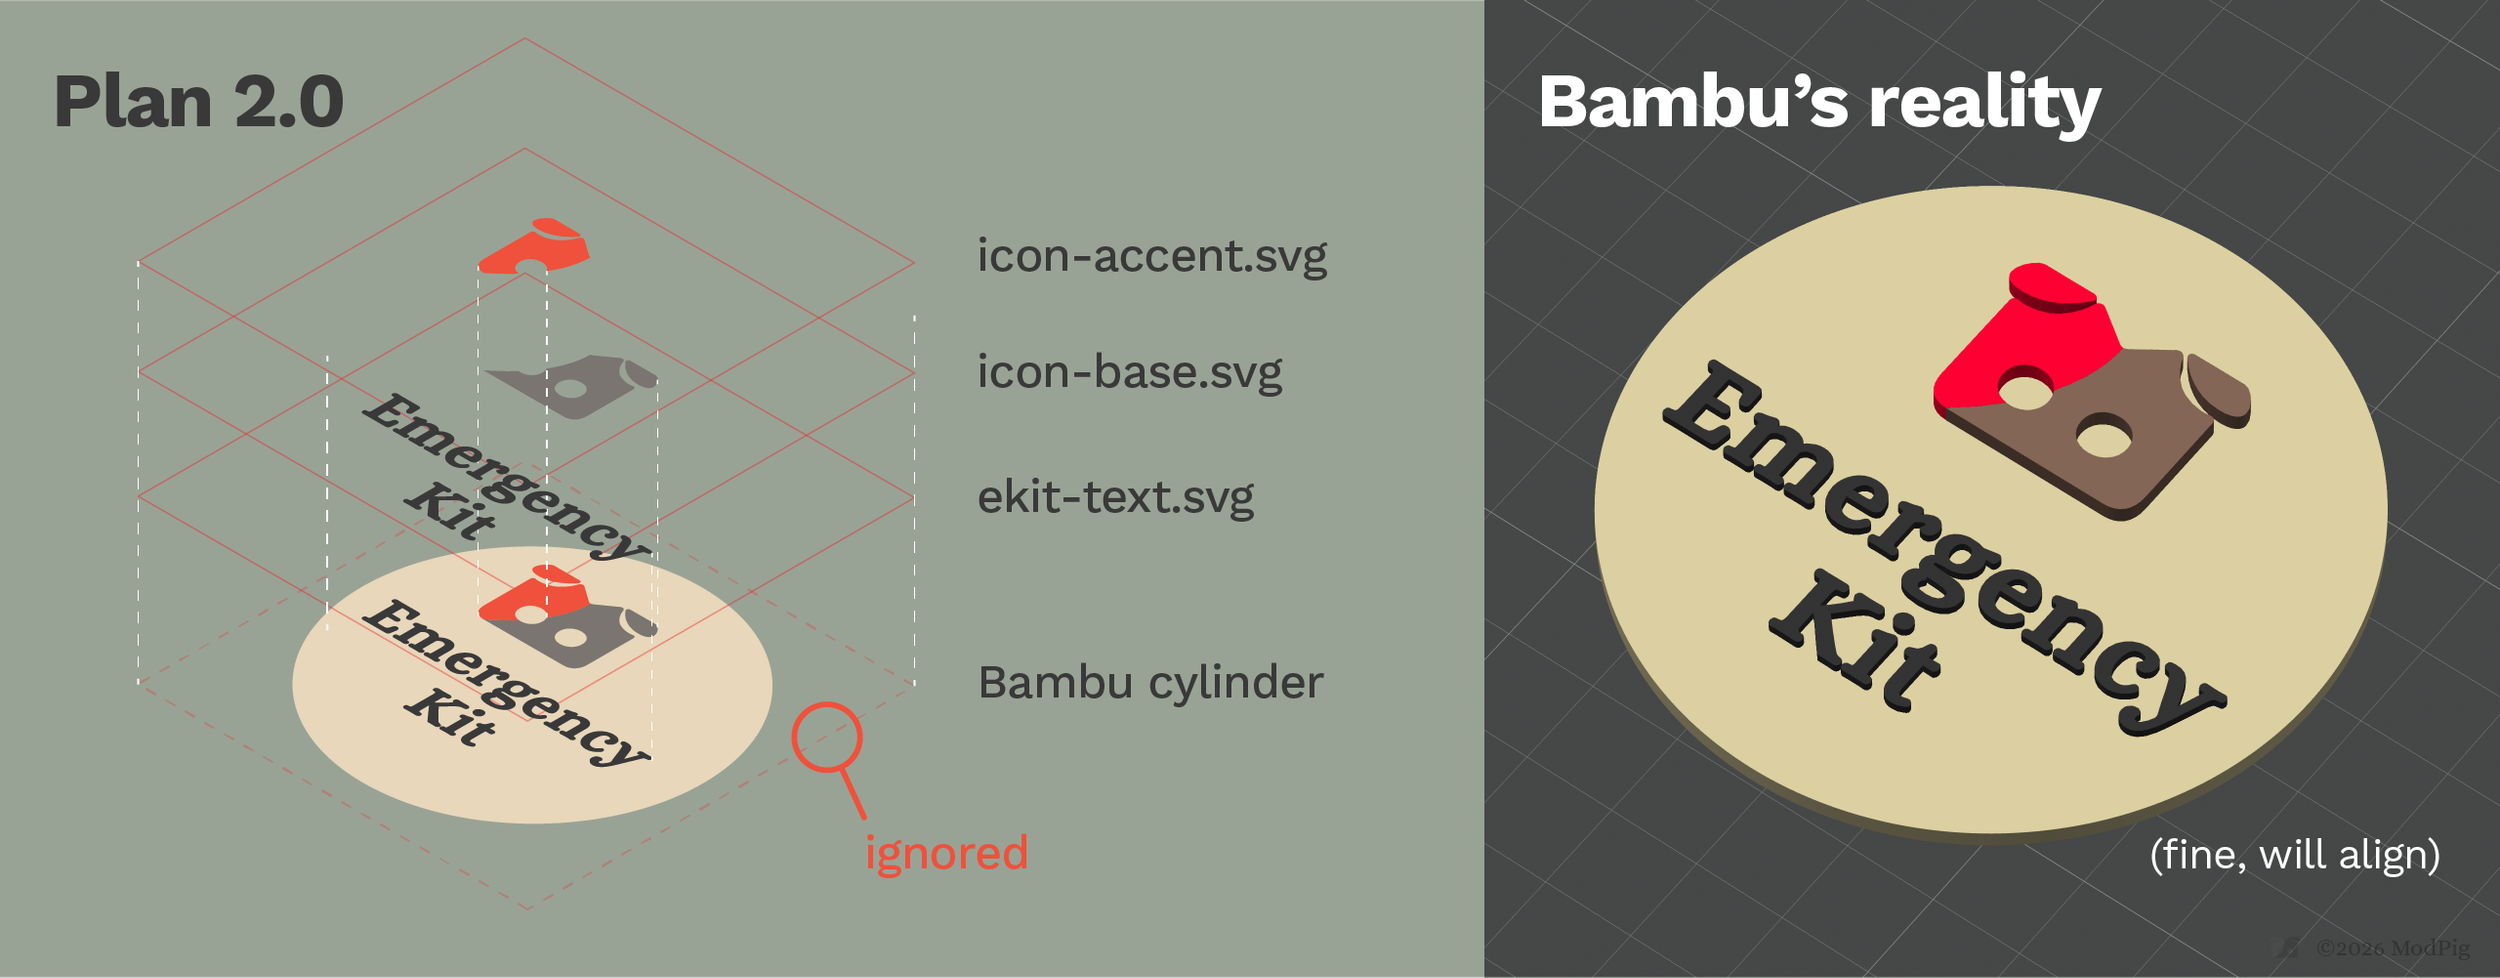
After a bit of research, SVG was the way to go here. Illustrator can export it, and Bambu can import it. So we tried it, and it merged the two halves of the icon together. It also made swapping text difficult, so it became obvious that this was going to have to be done in 3 layers, and that’s where the fun started.
Issue 1: Alignment
Turns out even if you line up your SVG precisely in Illustrator and export, Bambu just randomly tosses them on the plate without a care in the world as to where they should go. Great.
So we can just tell it to align the layers, right? Nope. Center points are all over the place too, so we’d have to manually line the layers up and hope for the best. Not good enough.

The solution turned out to be building a rectangle “bounding box” around each export that are all the same size and larger than the disc (85mm worked). A 3D printer can’t print things that are just hovering in mid-air, so the bounding box was simply ignored. It still scattered all the layers around randomly, but now that they shared a common center point, we could type X and Z coordinates in for each layer and they all lined up again. Phew.
From there, it was a matter of adding the SVGs as parts to the cylinder by right-clicking it, and choosing “Join”, “Use Surface”, and setting the height of the icon bits to 2mm and the height of the text to 1mm (better legibility, fewer filament changes). Fortunately, swapping SVG text files on the plate was now easy too thanks to them all being the same size.
Issue 2: Janky Surface
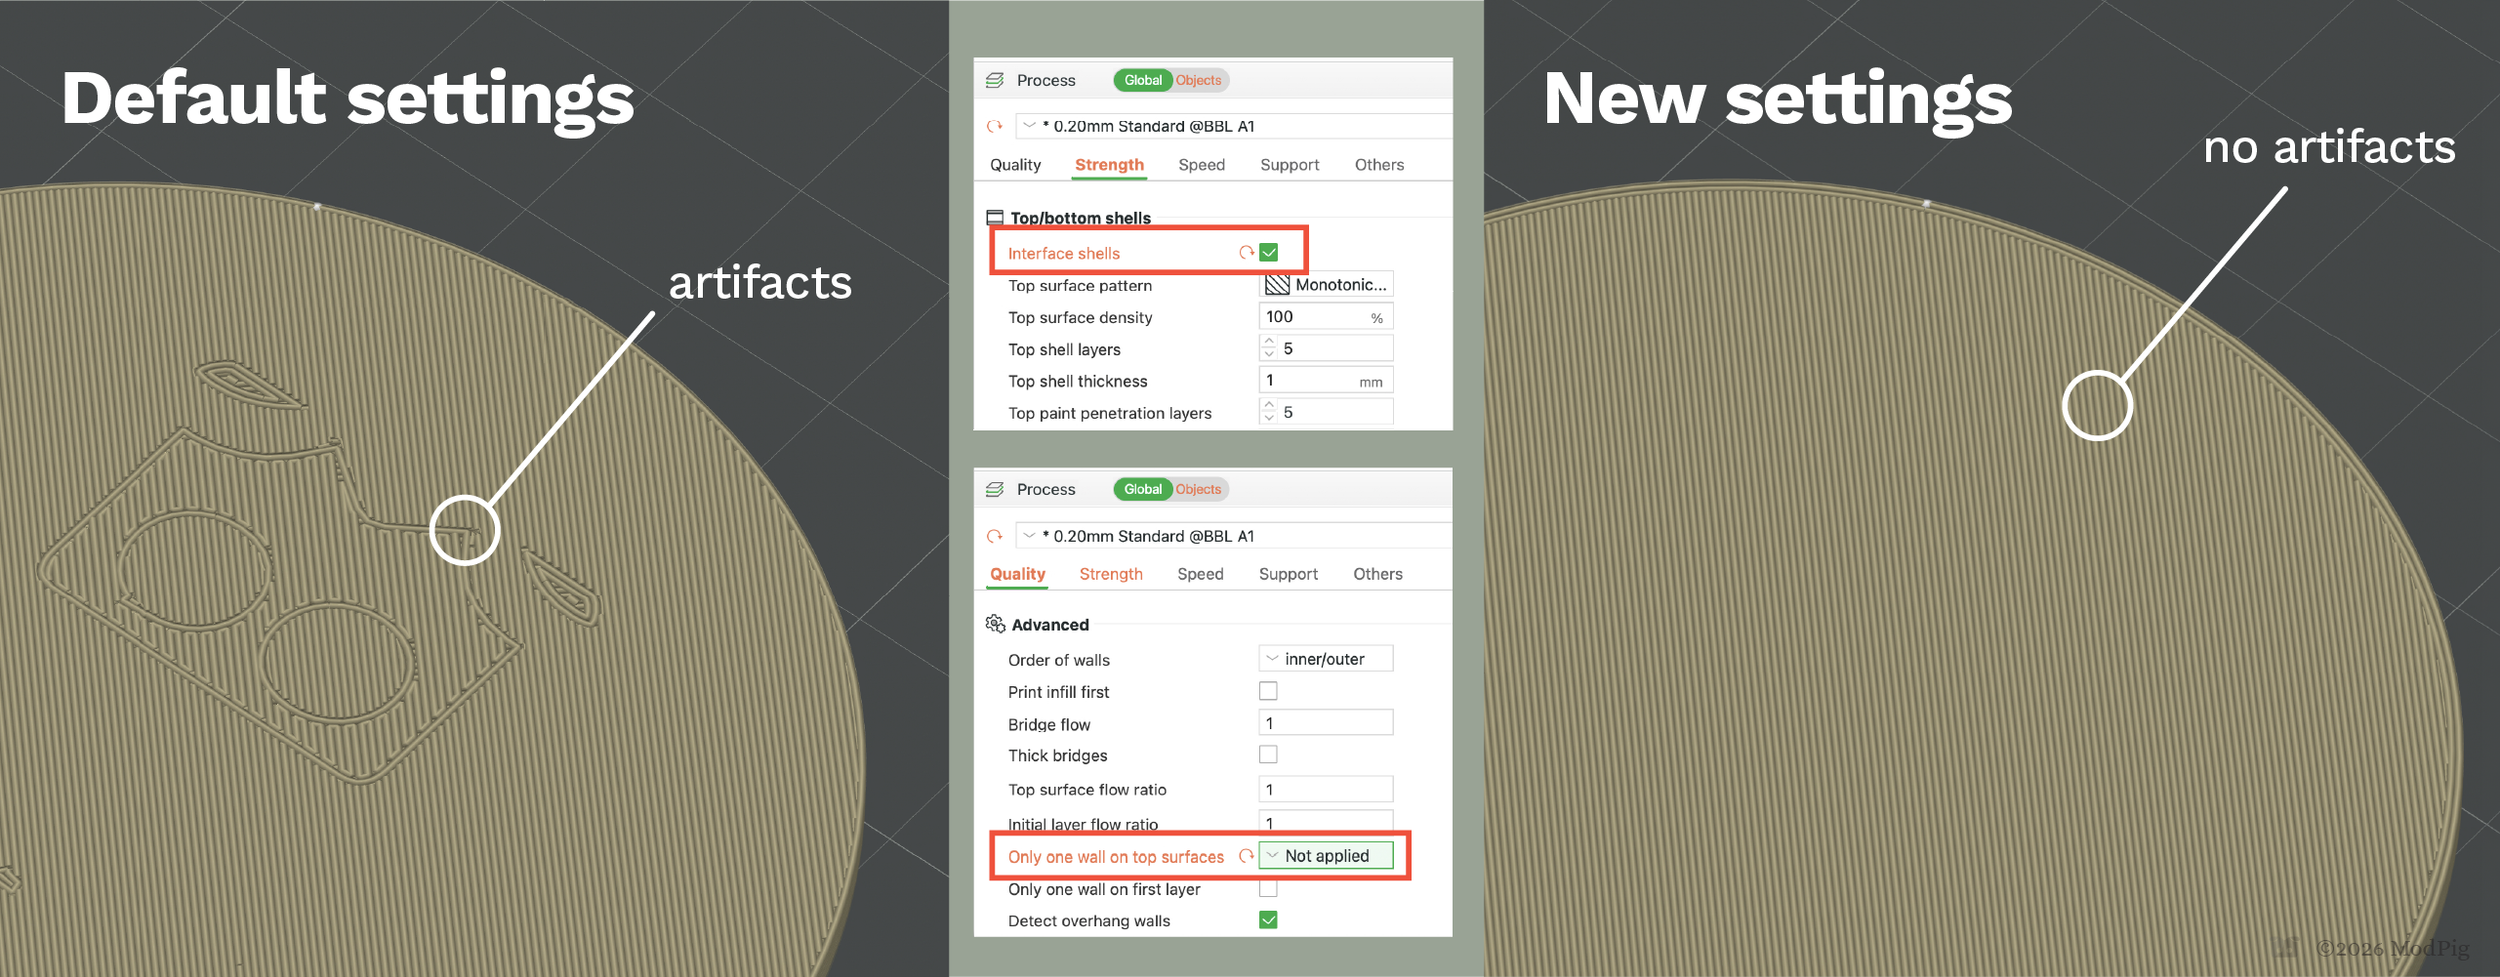
The next issue we ran into involved the transition from the disc to the first layer of the text and icon. No matter how much tweaking, positioning, and everything else we tried, Bambu Studio would always create some weird artifacts in the top layer of the disc that showed through
The solution was to go into Settings and turn on “Develop Mode”, then go into the Strength section and turn on Interface Shells (which now shows up), and then go into Quality > Advanced > and set “Only one wall on top surfaces” to “Not Applied”, because obviously that’s the setting we needed.
Now we had a clean transition from disc to text, and everything read well.
Issue 3: Custom Filament Setting For Polychroma
Bambu Studio has some friction when it comes to third party filaments.
They put RFID tags in their own filament spools which tell the AMS what the filament is and sets all the temperature settings and everything accordingly. Since we were using Polychroma PLA Matte, we were running into stringing issues because it needed the nozzle to be at 200° (Bambu filaments are happy enough at 220°)
Fortunately Bambu still allows for custom profiles, and Polymaker has a tool to build ones to download for its filaments, so we went over there and found the right one.
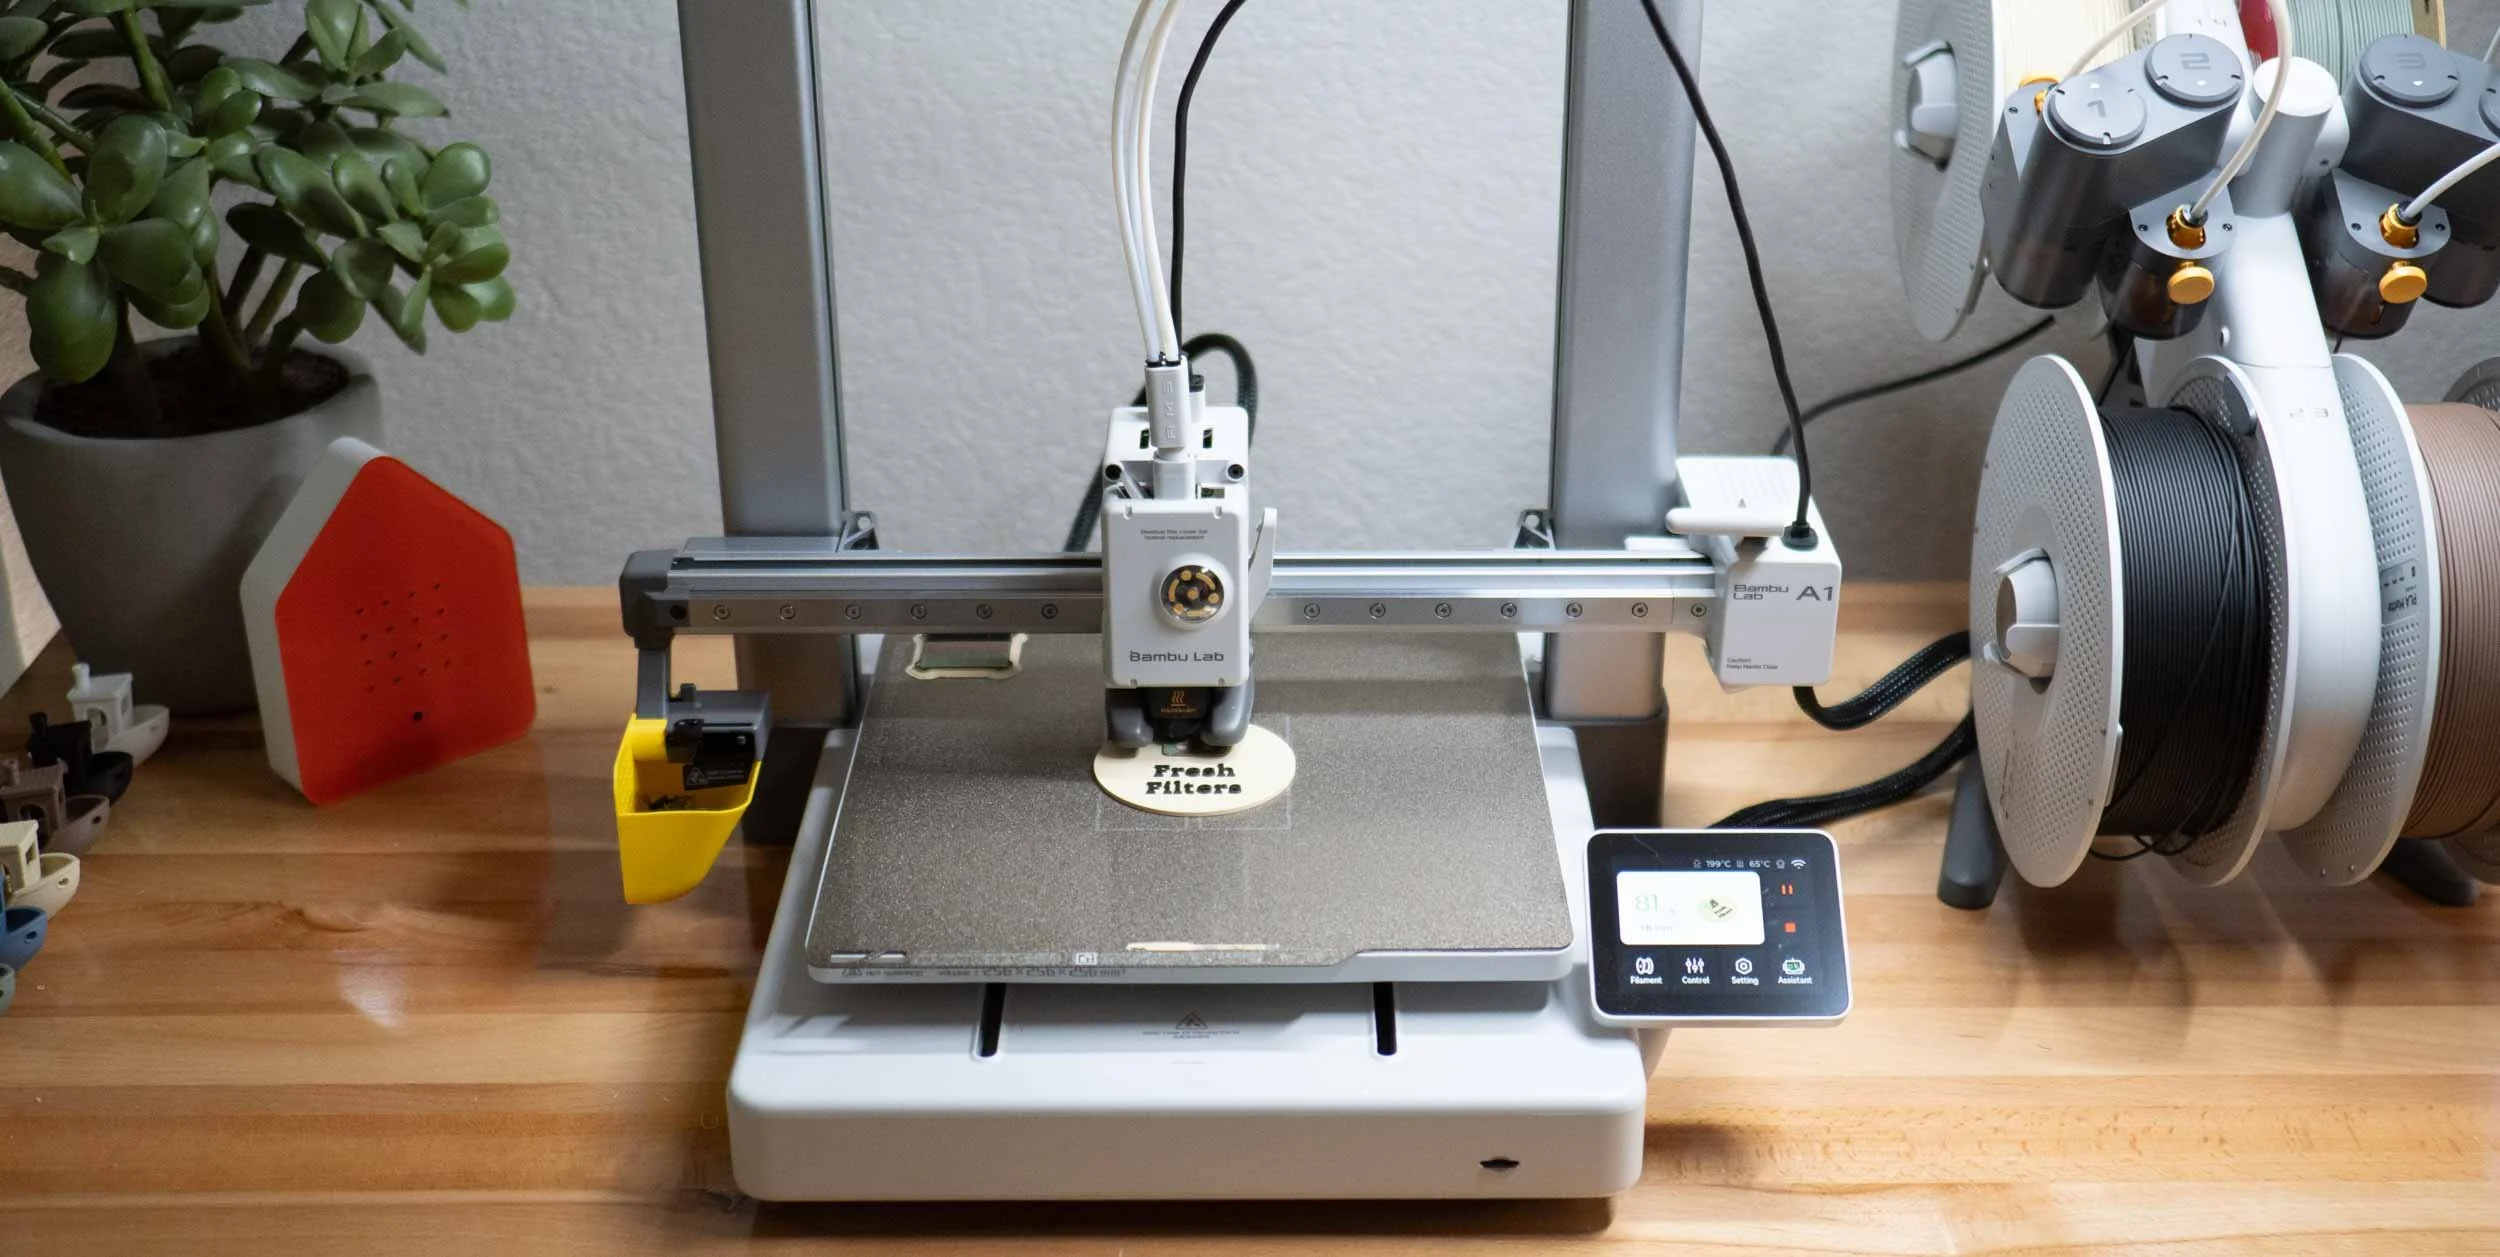
Bambu has instructions on how to work with this on their site, but there are some steps that we need to remember each time a print is needed (they don’t save directly in our A1 printer.)
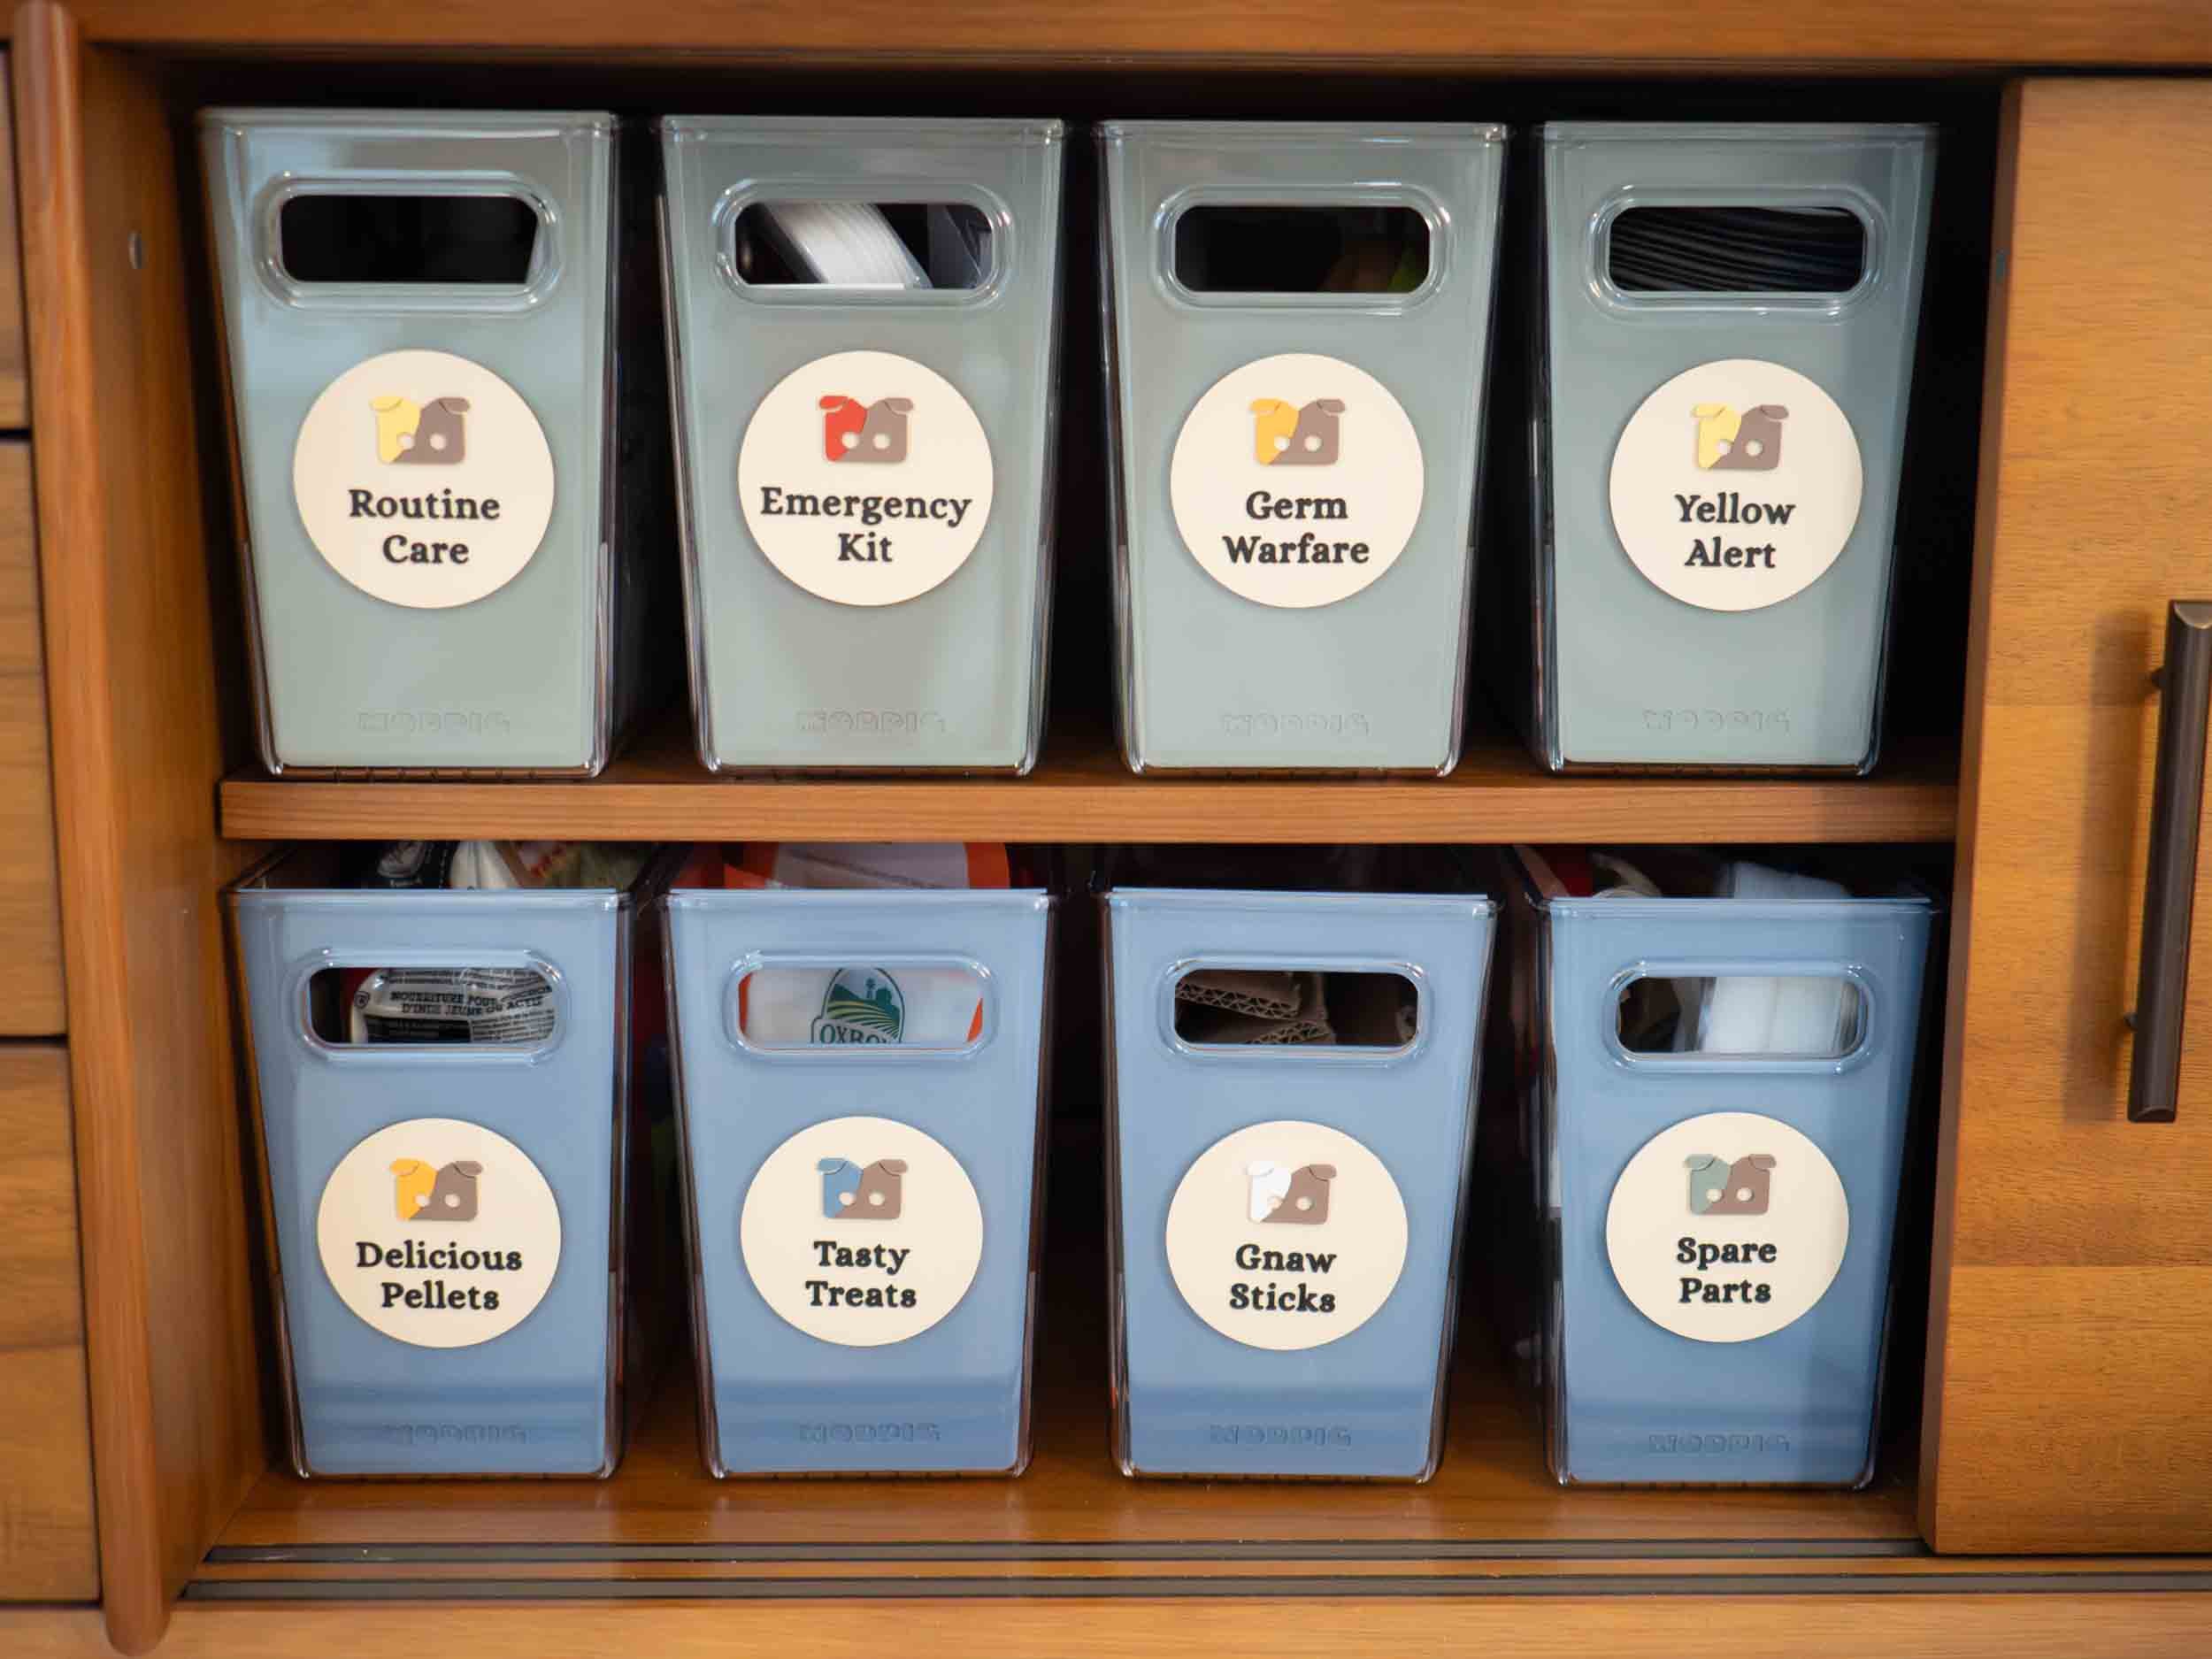
That settled, we were able to get our placards out, and they look great! The tiles are printed, and Tangent remains unimpressed.