We Overdesigned Labels (And We'd Do It Again)
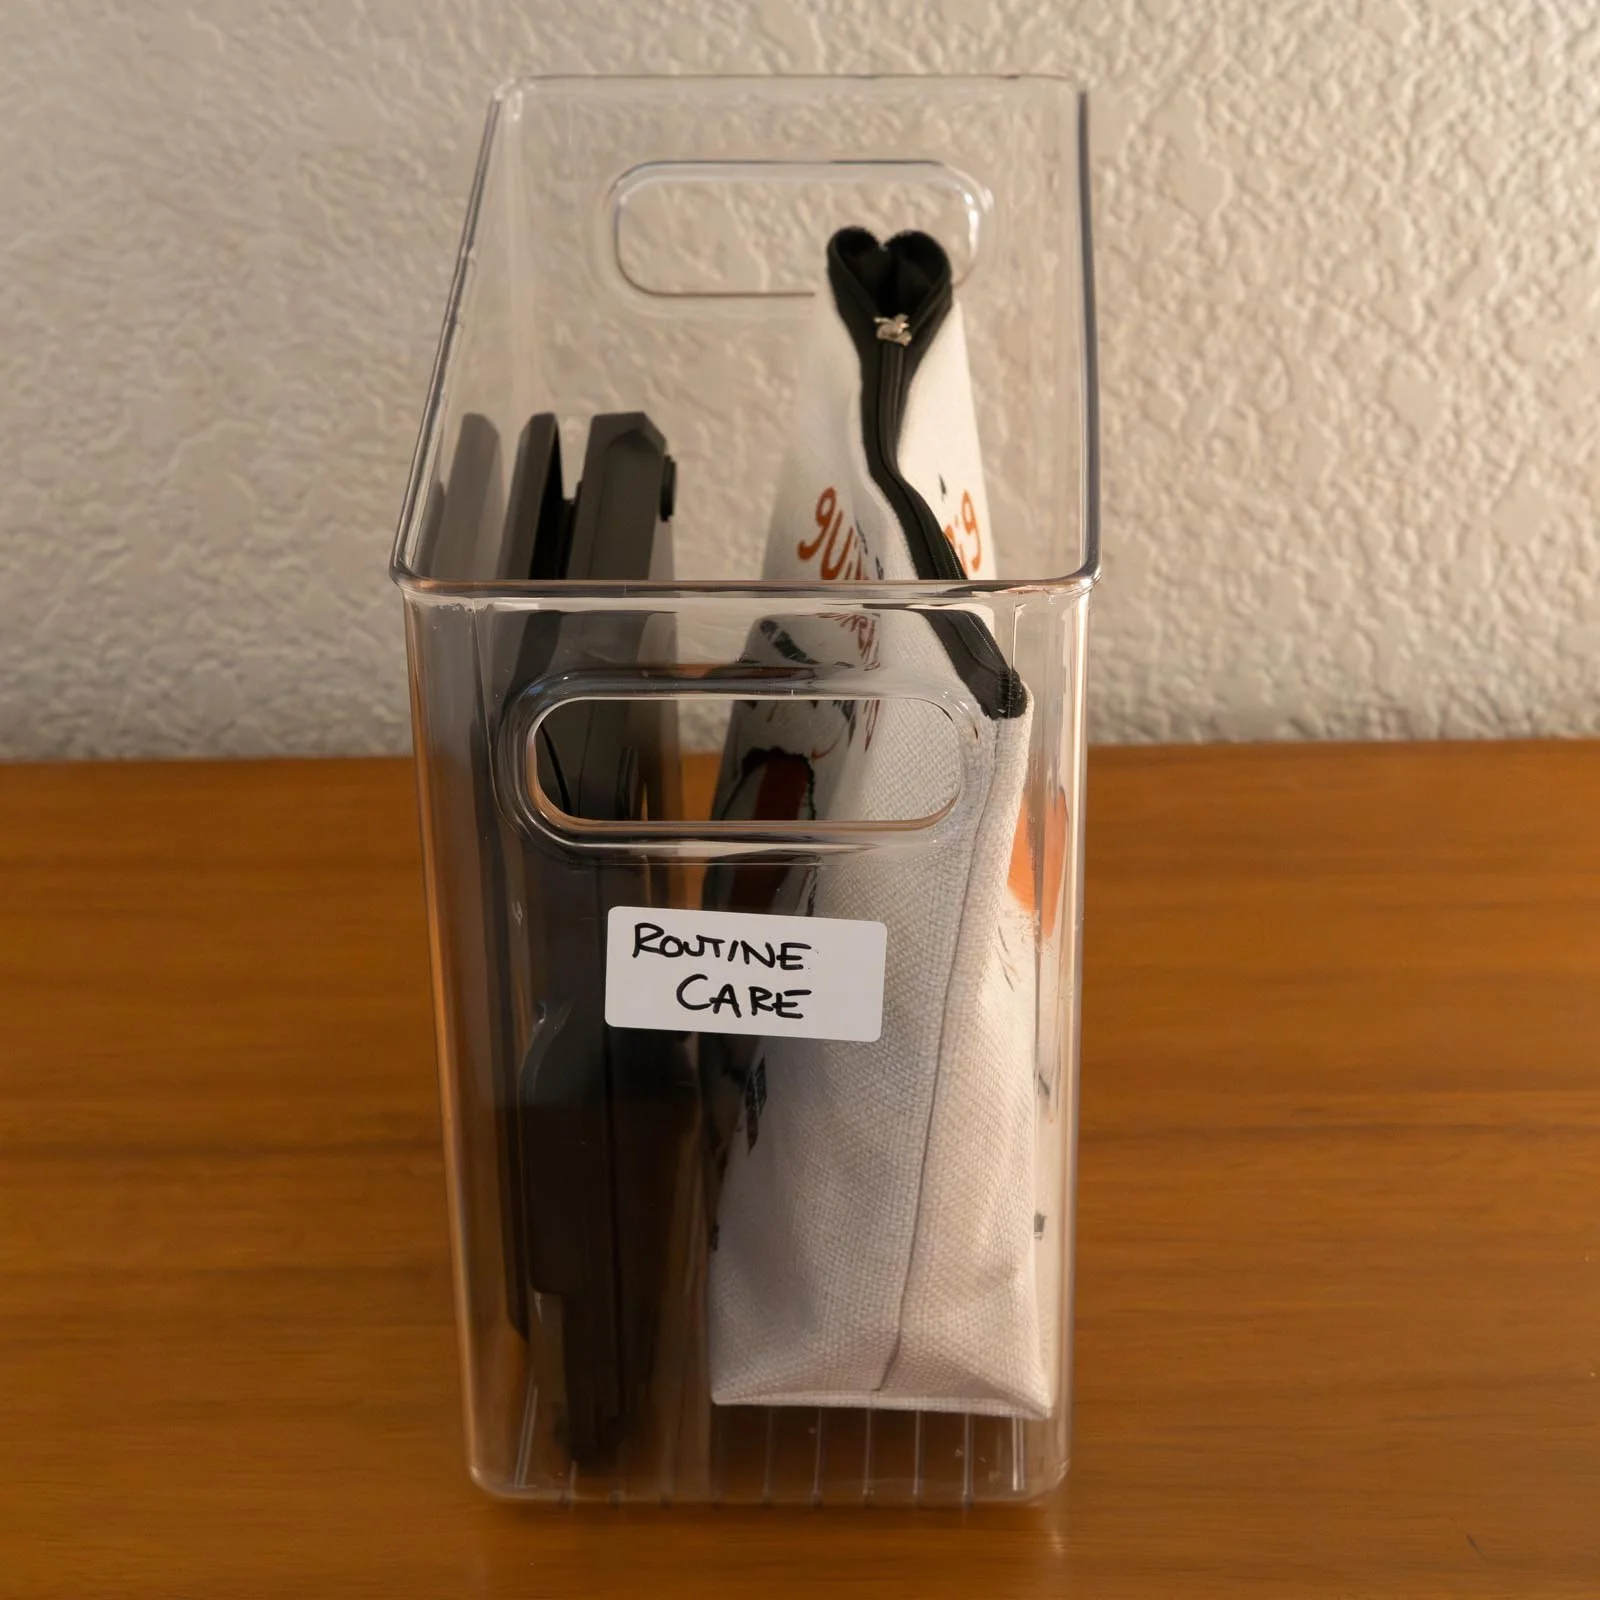
Guinea pigs seem to have more belongings than we do. Our cabinet was full of recently acquired piggie provisions, and while it was all placed into bins in some sort of order, it was hard to know what was where. Labels are the answer, we thought! And we even had some removable write-on labels right there in our kitchen next to a sharpie. Perfect. And here’s what that looked like (not great):
We could do better. While rifling through our cabinet to find some inkjet-printable labels, we had it — 3D printed tiles instead of boring paper labels. We looked at each other and grinned. This was a thing that needed to be a THING. Time to ModPig our labels.
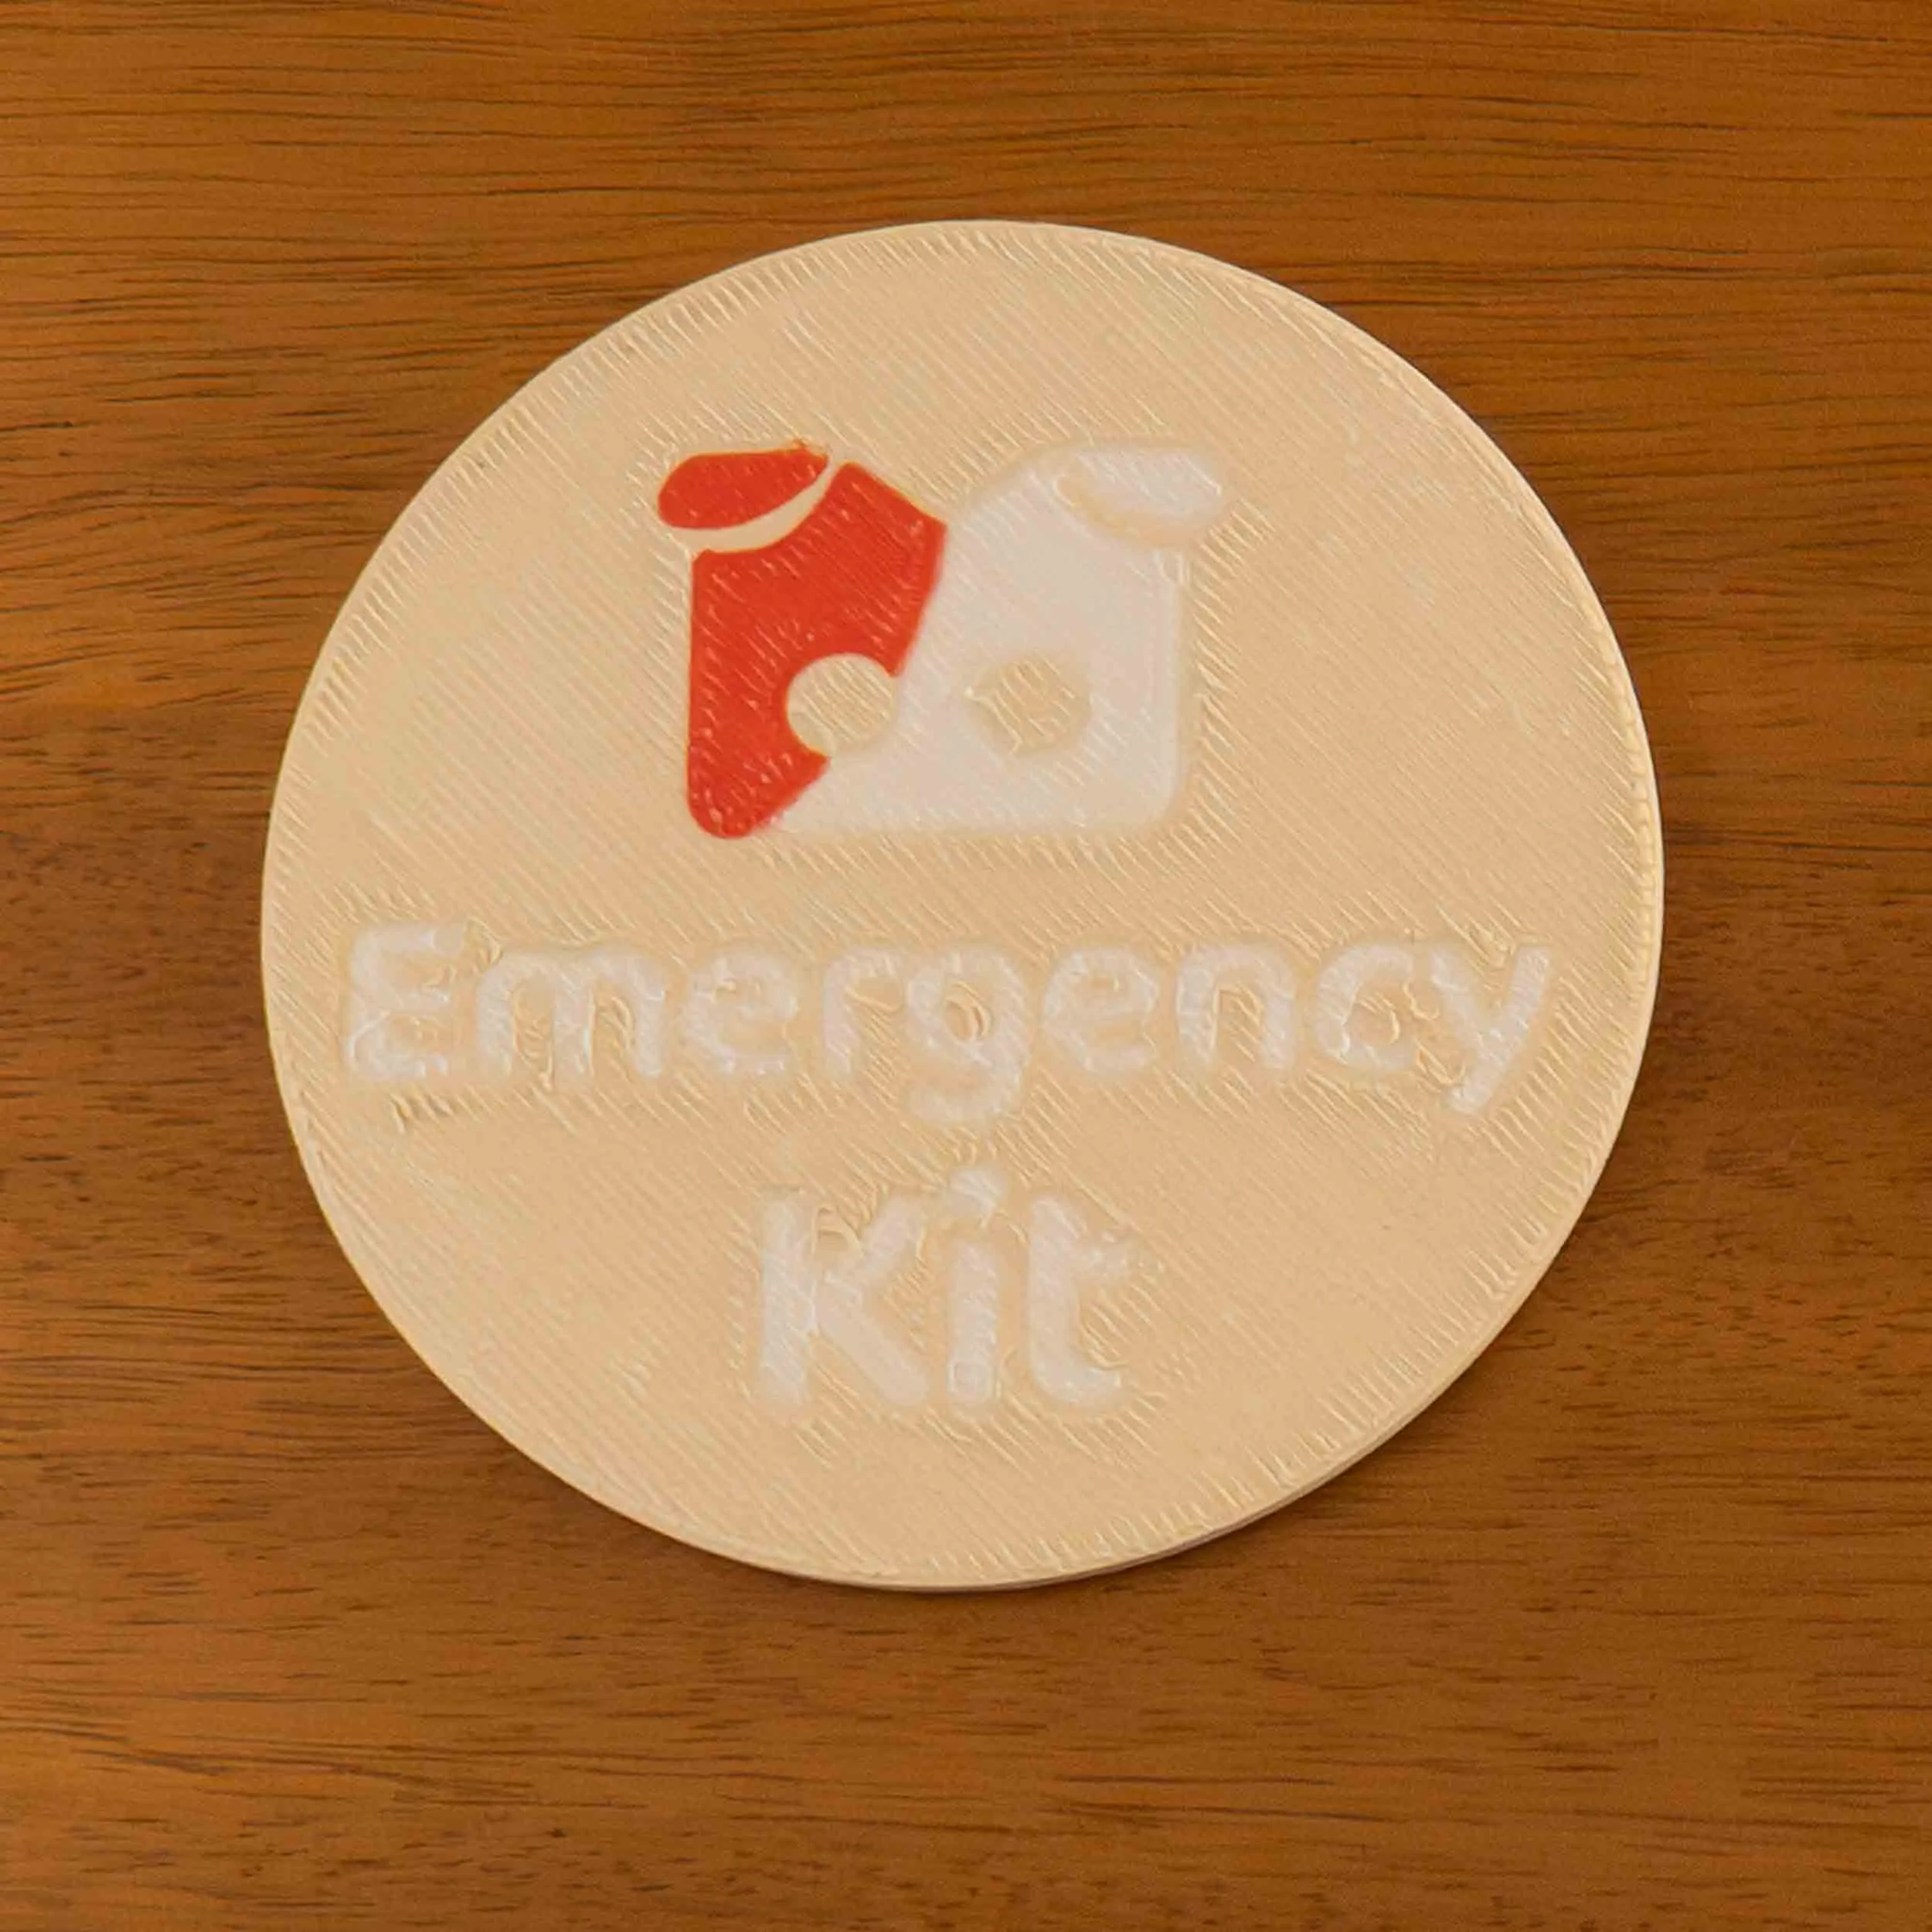
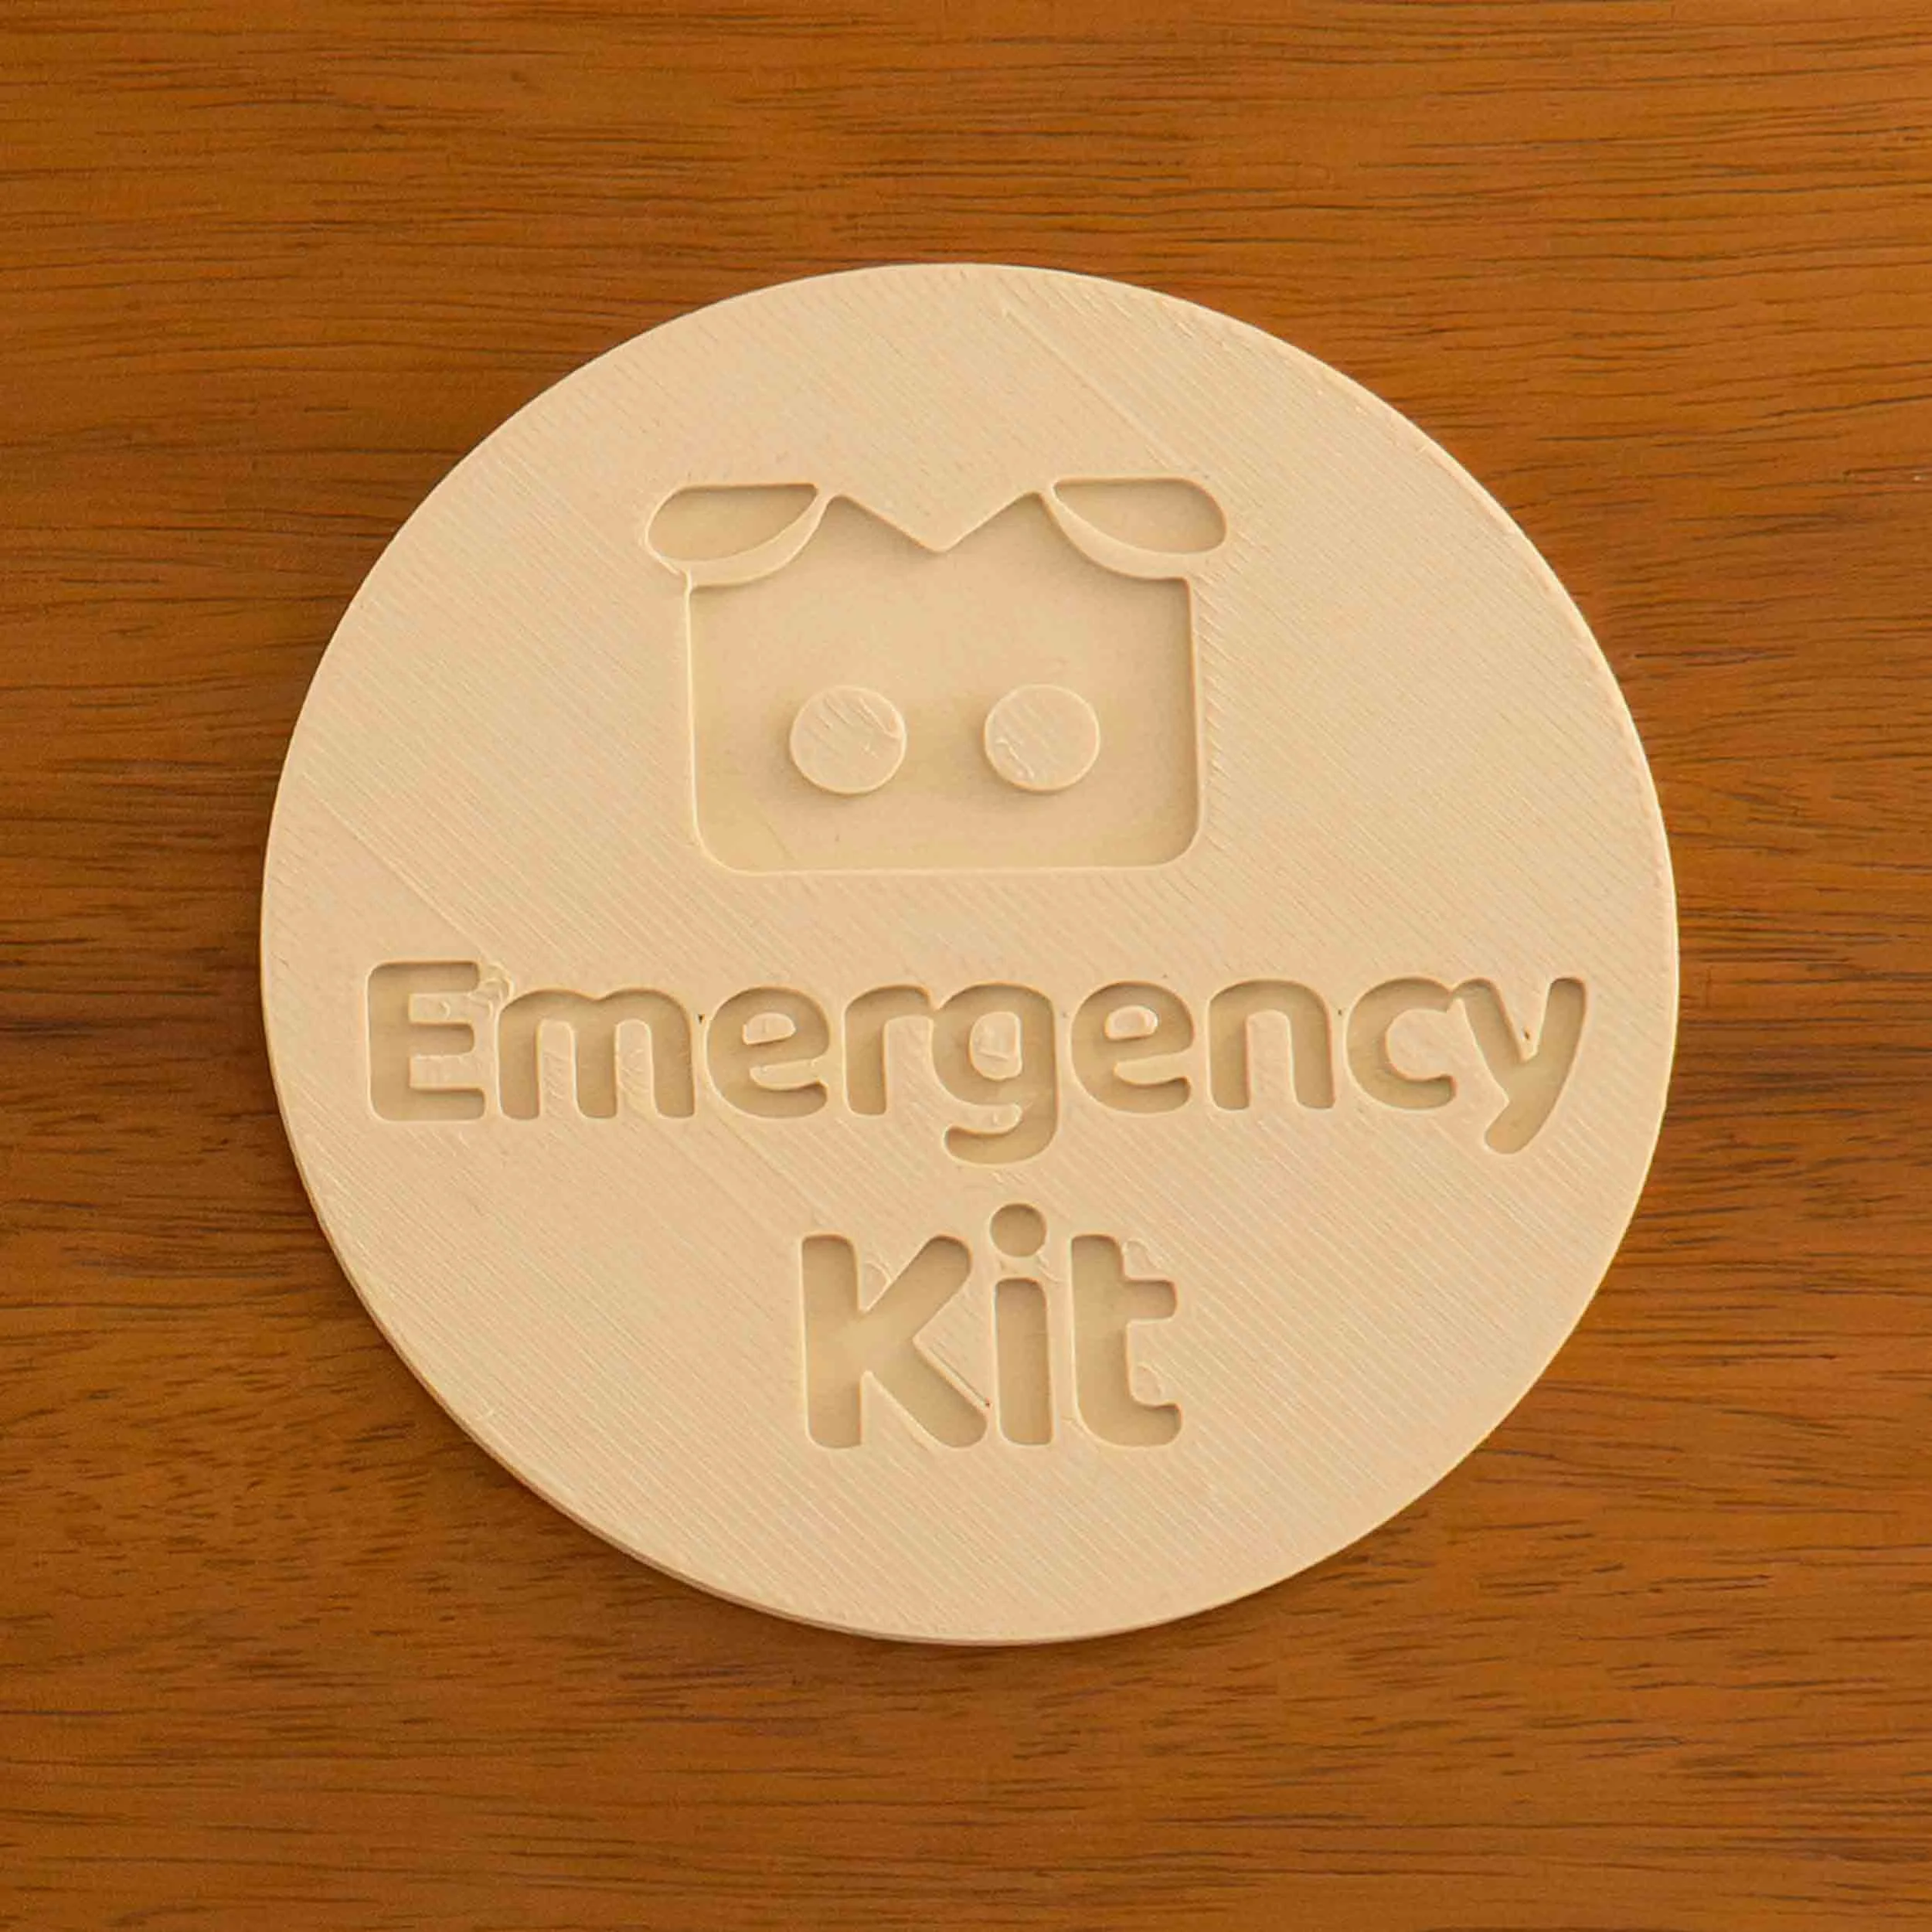
We set to work designing them, and knew a circular tile would look great in our space. Using our ModPig icon was a must. One of us (the designer) created a prototype and we had that tile printing in no time! Below is what we came up with… hmmm… definitely a prototype. We had some issues with the wood filament getting stringy, and the white definitely didn’t contrast well.
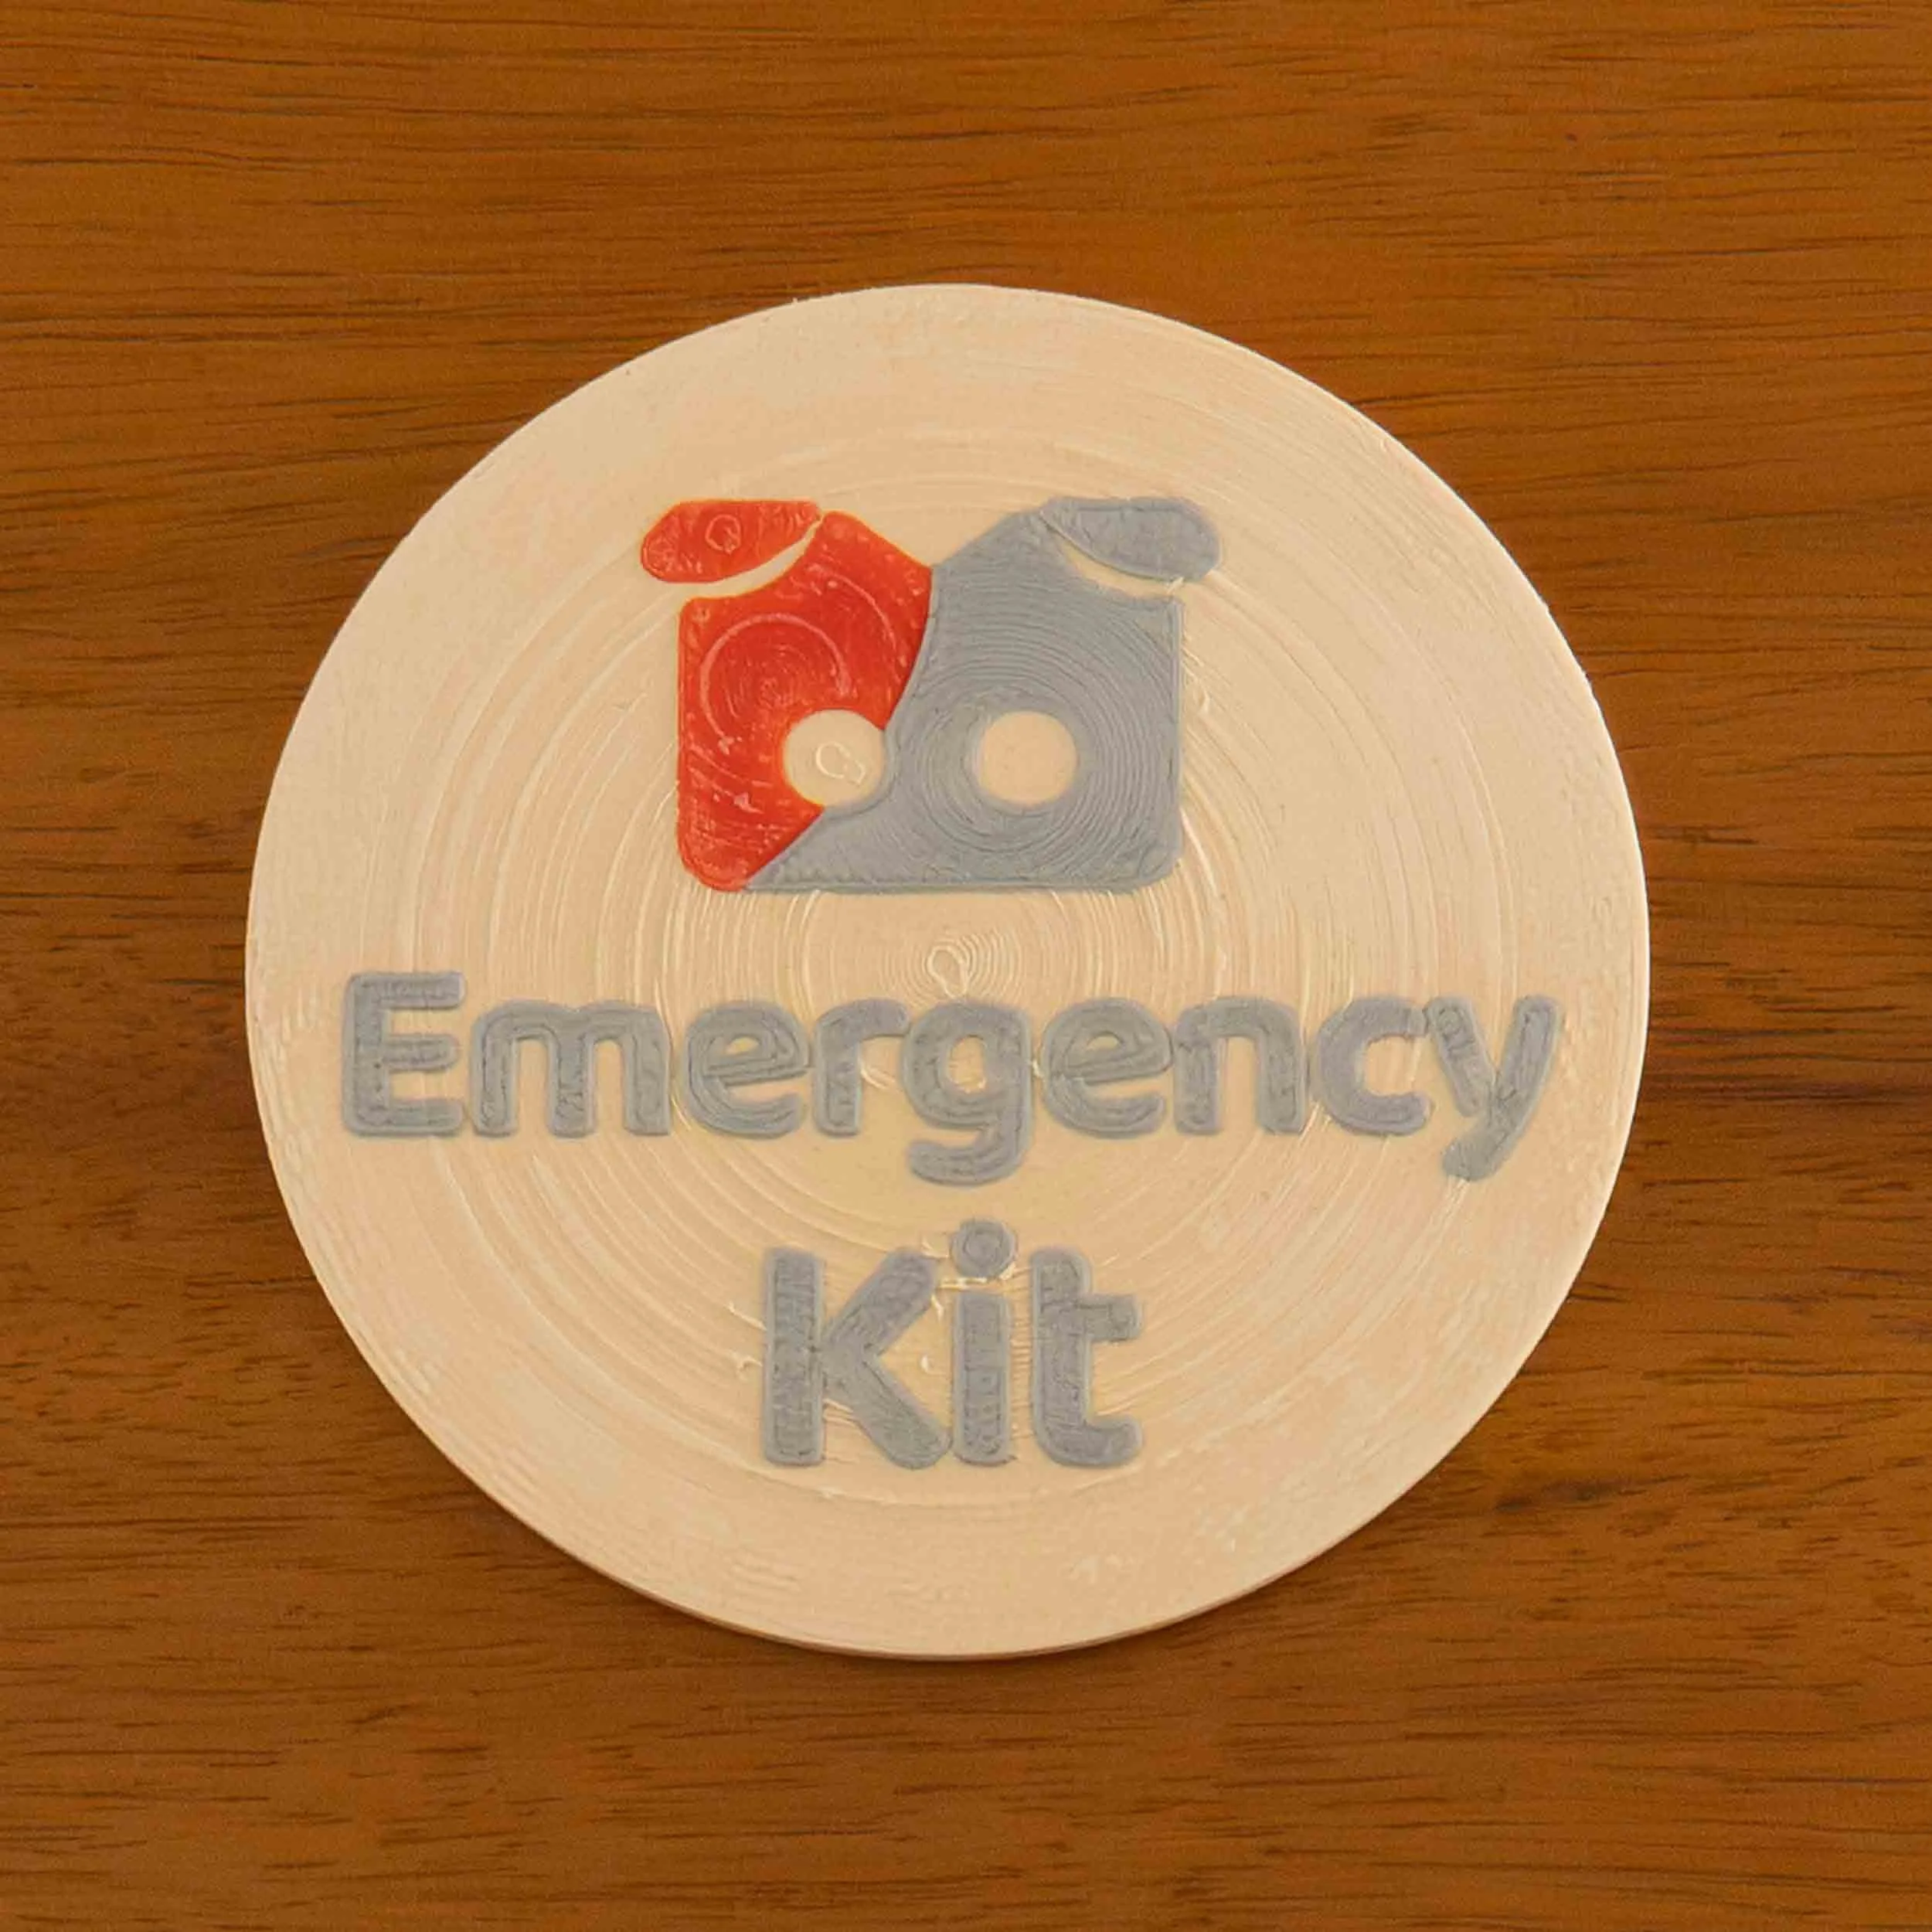
For the next attempt, we tried it with silver filament and a spiral print for the wood. Still not wonderful, but better in some ways. It still had the stringiness issue. And let it be said, we’re not currently the biggest fan of silver filament. Maybe it has a place in tiny doses, but it couldn’t be on our tiles. Back to the drawing board.
We liked the wood, but we had to do some research to figure out why it wasn’t printing nicely. Aha, a couple of days in the dry bag (wood filament really sucks moisture in which can cause bad prints), and reducing the nozzle temperature made a world of difference! We decided to try embossing a tile with only the wood. Getting better, but still not there.
What if we printed little letters to put into the embossed wood tile? We gave that a go and while we technically managed to get the little letters in, it required brute force that we wouldn’t want to use for every label.
Before another try, we absolutely had to do something about our filament color options. The red, white, and silver just wasn’t cutting it. So we rolled up our sleeves, sat down with our brand color guide, and started poring through filament options to try to find any that matched. This sounds easier than it was. At one point, we even debated getting custom color filament printed. But in the end we were able to find some off-the-shelf colors that got close enough to satisfy us both.
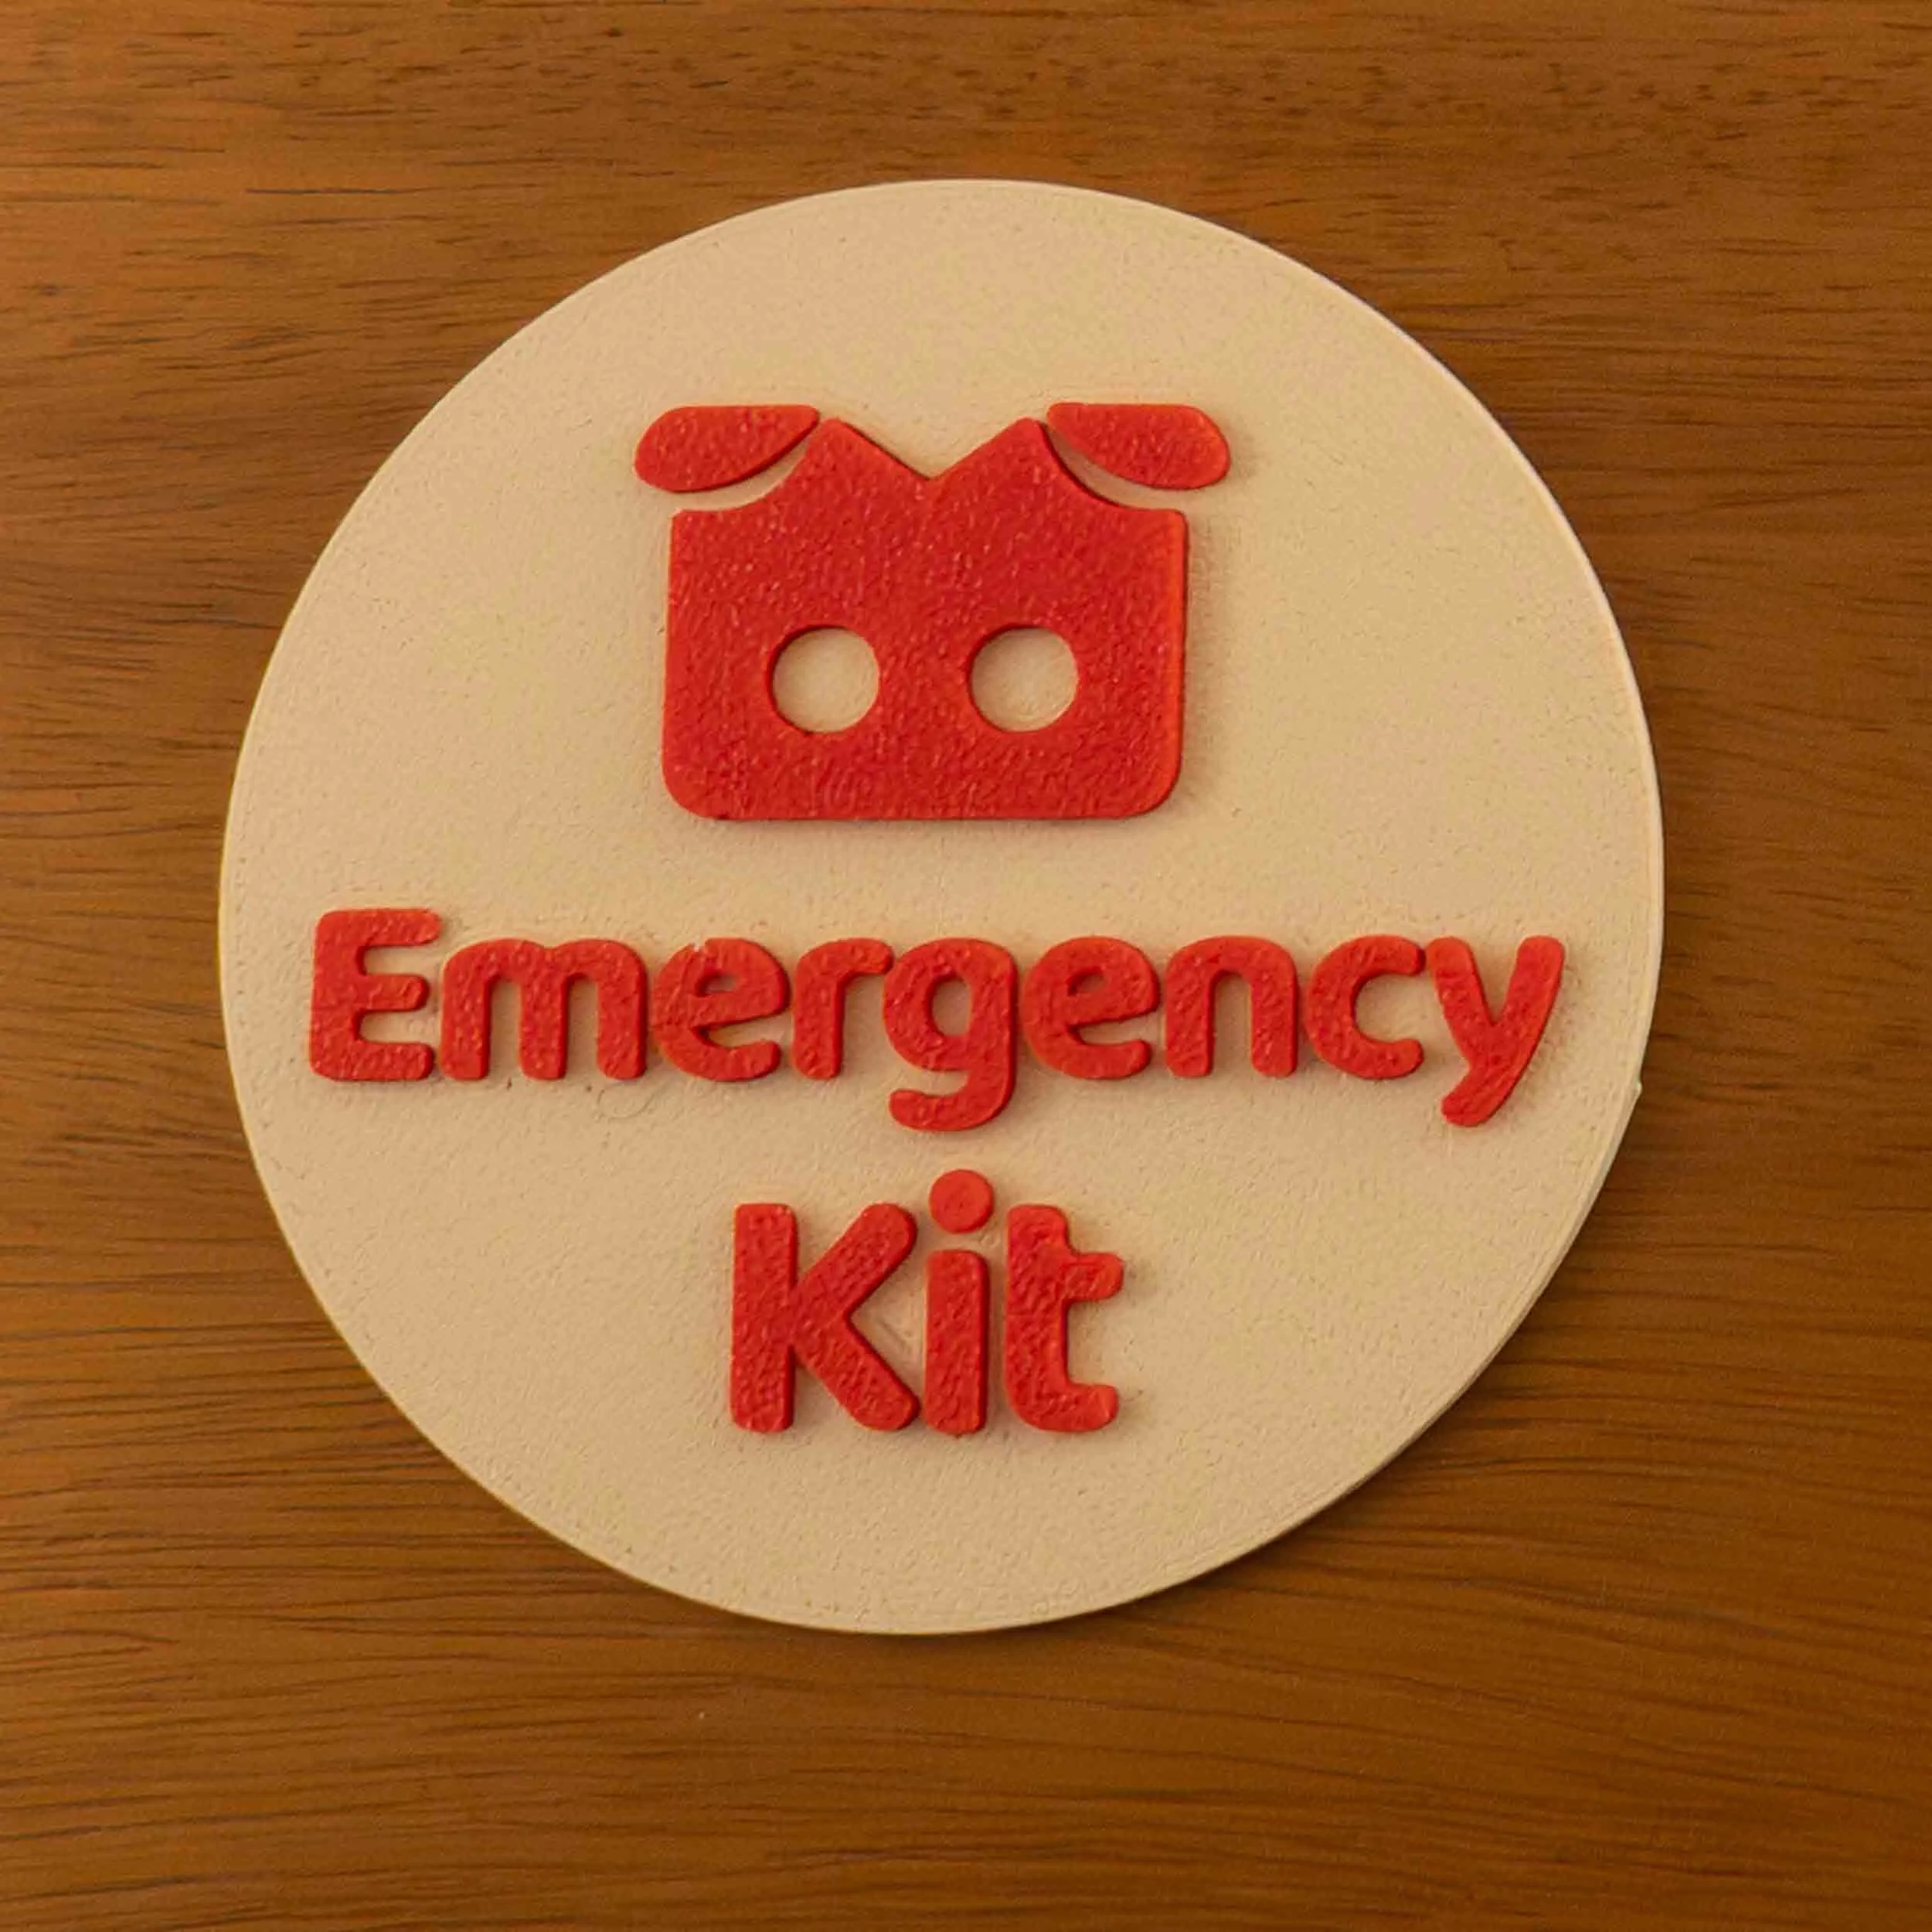
Problem solved, back to the tile design. Let’s try printing with a raised icon and letters. So much better! The icon looked fantastic, but the text seemed a little muddy.
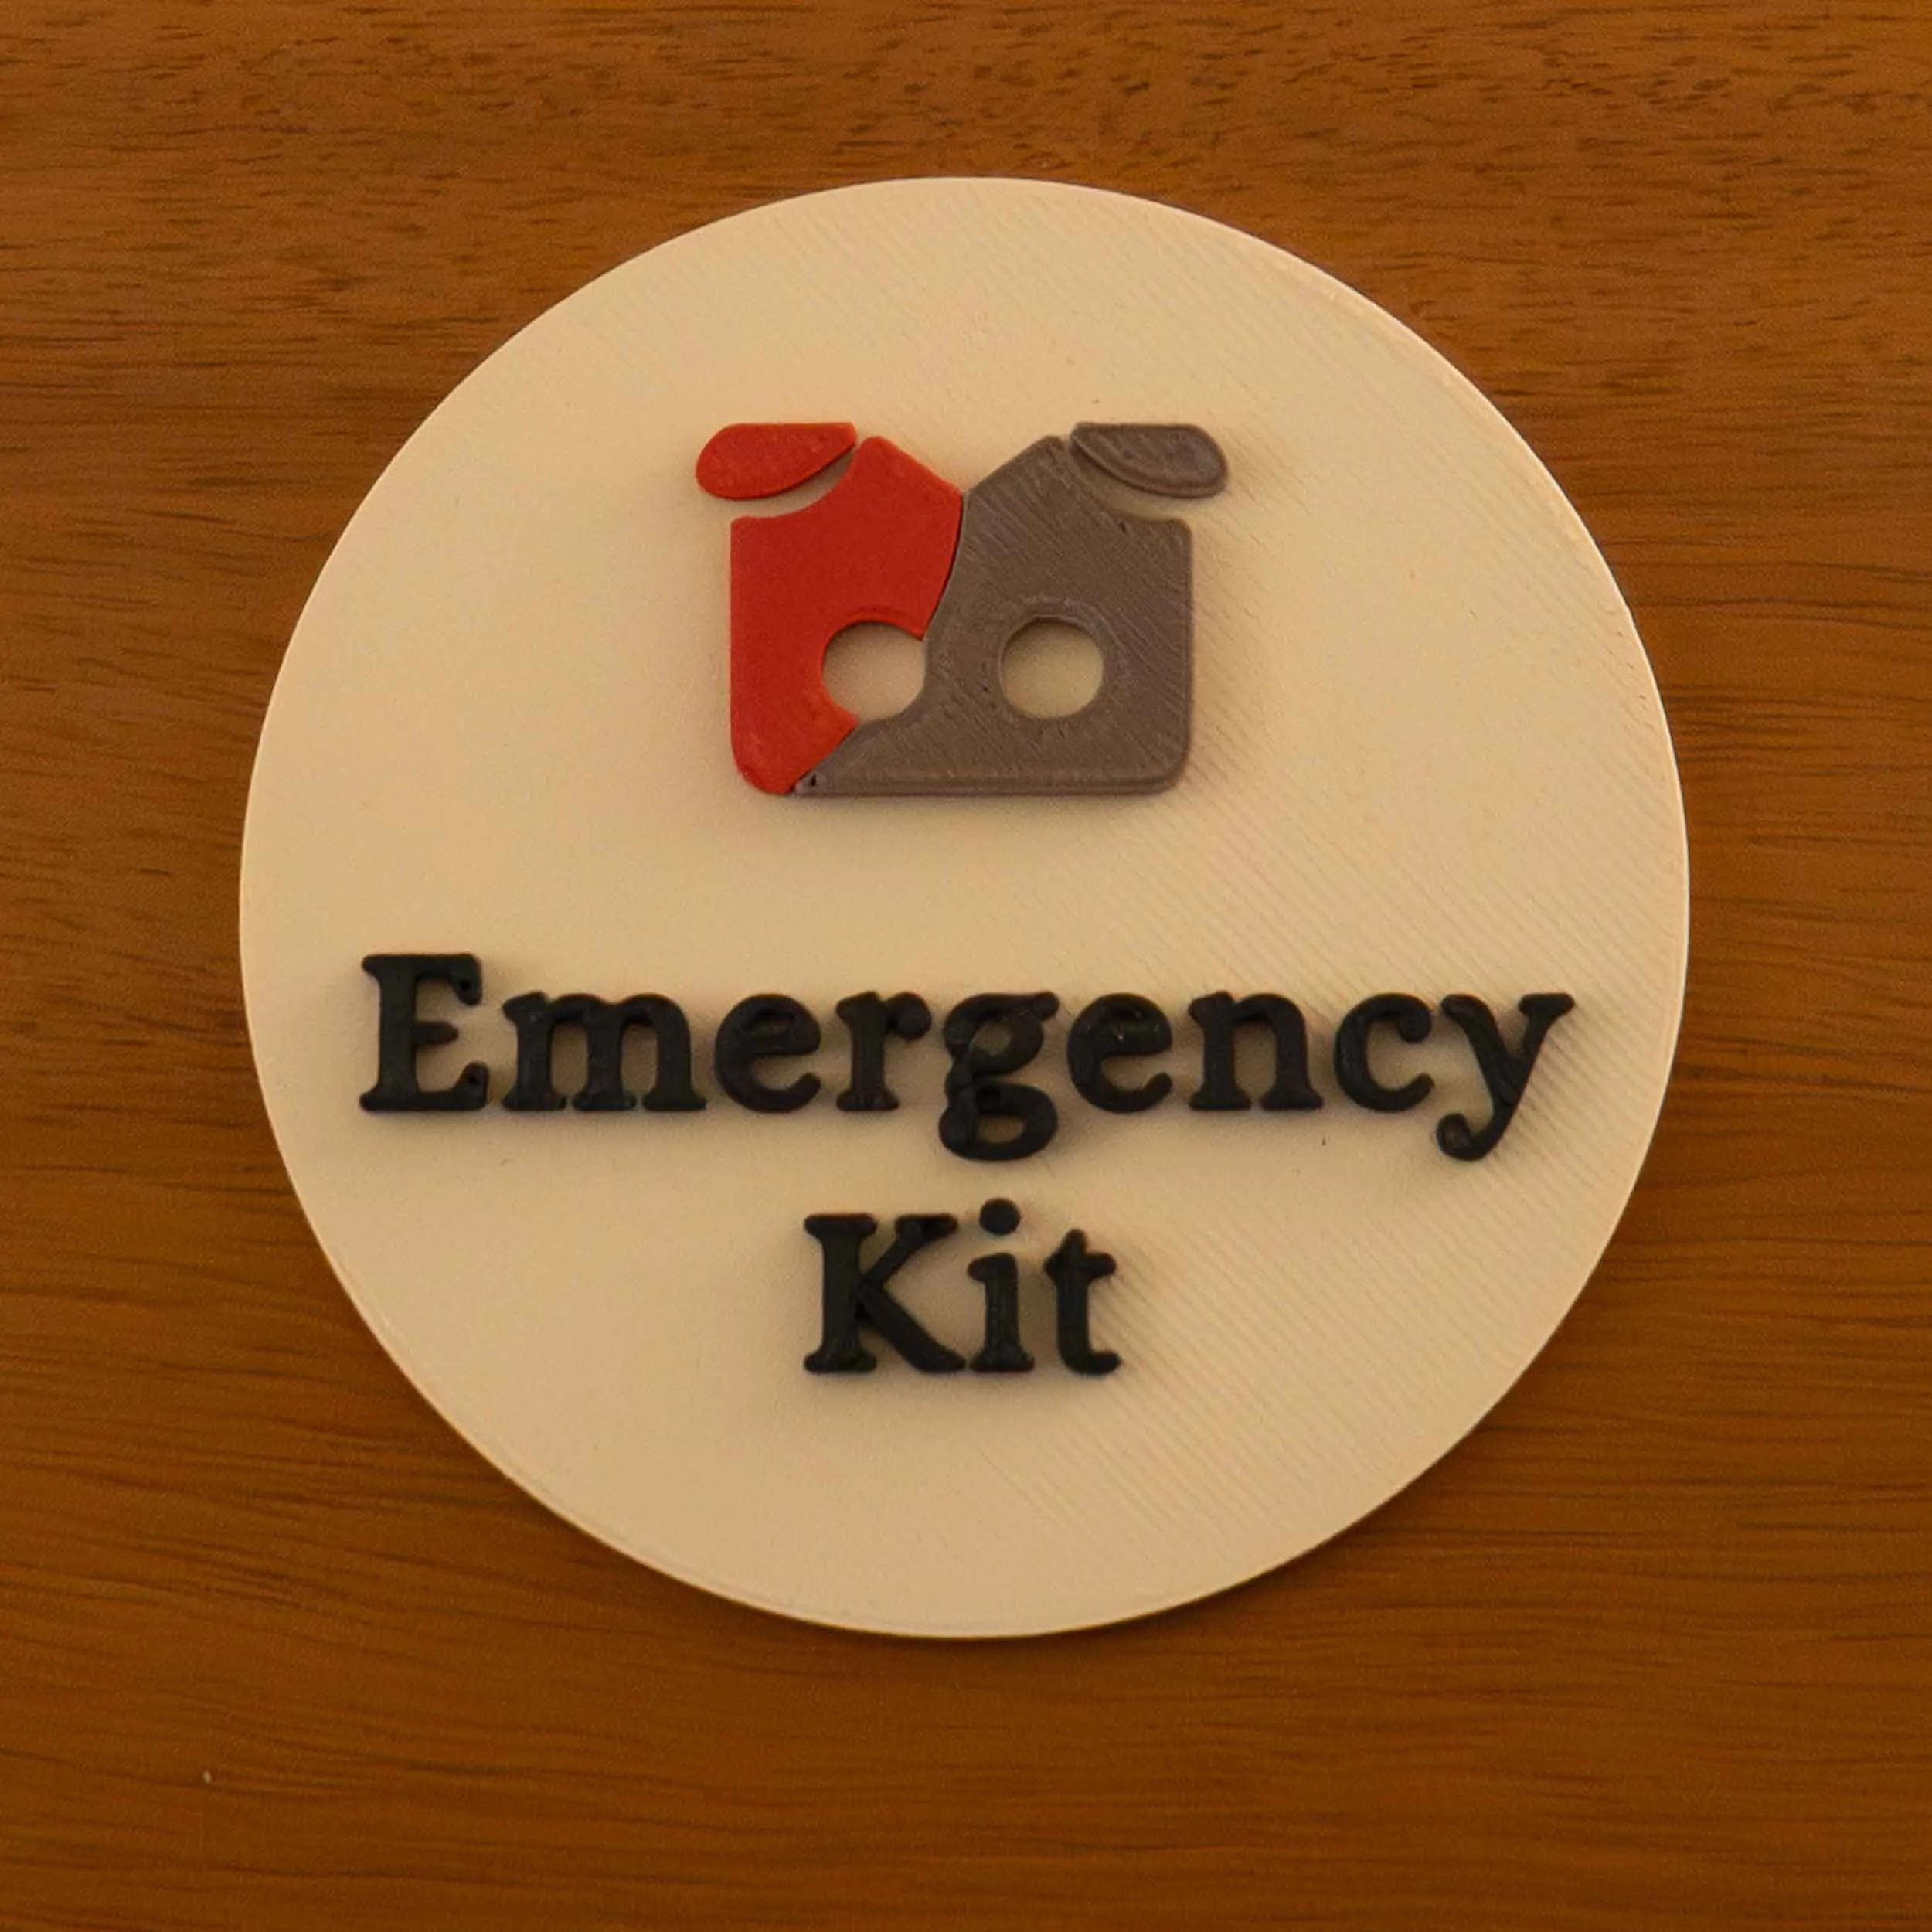
We tried again, keeping the icon the same, and lowered the height of the text. And we had a winner we were both very happy with. And our ModPig tiles were done… or so we thought.
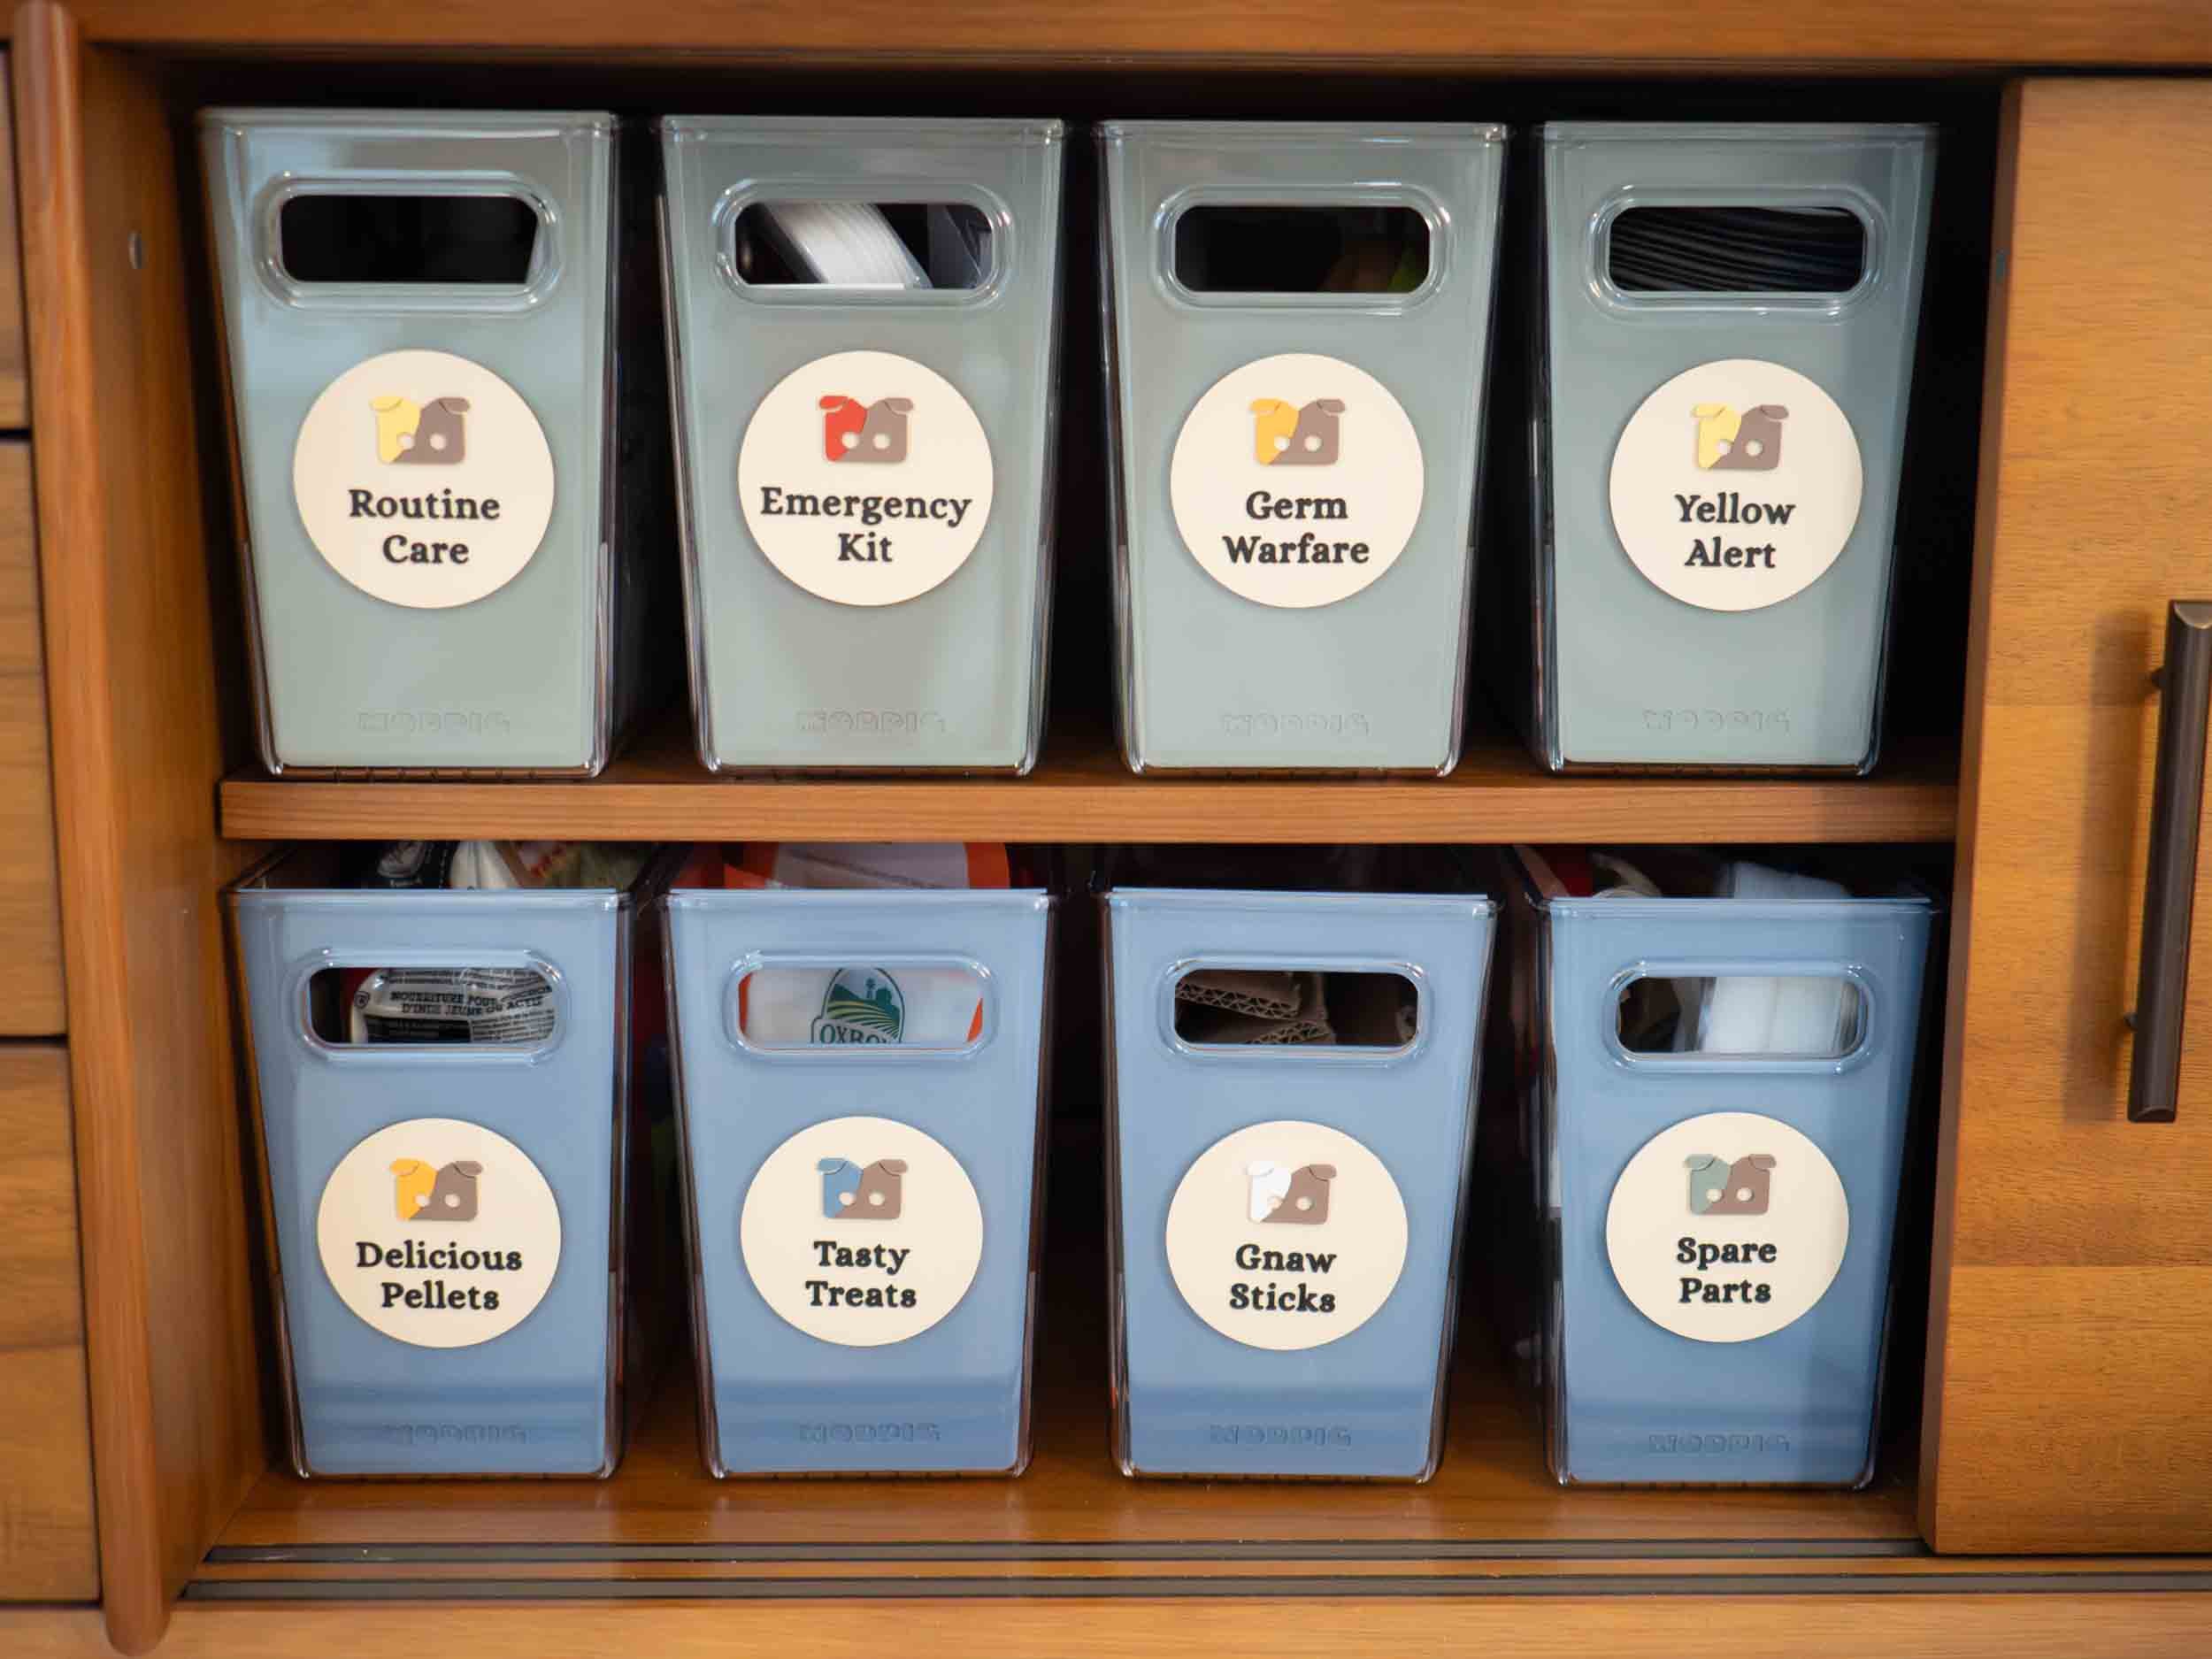
After placing them on the bin, the order the tiles provided seemed to highlight the visible clutter in the transparent bins. We debated buying different containers, but these bins are awesome and fit our shelves perfectly. Then we realized that the inside of these bins has a little groove that would be perfect for a color plate to add background to the tiles. We used a piece of paper and scissors to make a cutout that fit perfectly in those grooves, dusted off our rulers and gauges, and set to creating a 3D plate that would fit perfectly. We printed the first prototype in our much disliked silver filament. It worked great! So we printed another one in our brand color we affectionately call Shop Towel. Awesome! We nearly stopped there, but the designer half of us had the idea to emboss our ModPig logo into the bottom. And that was the winner.
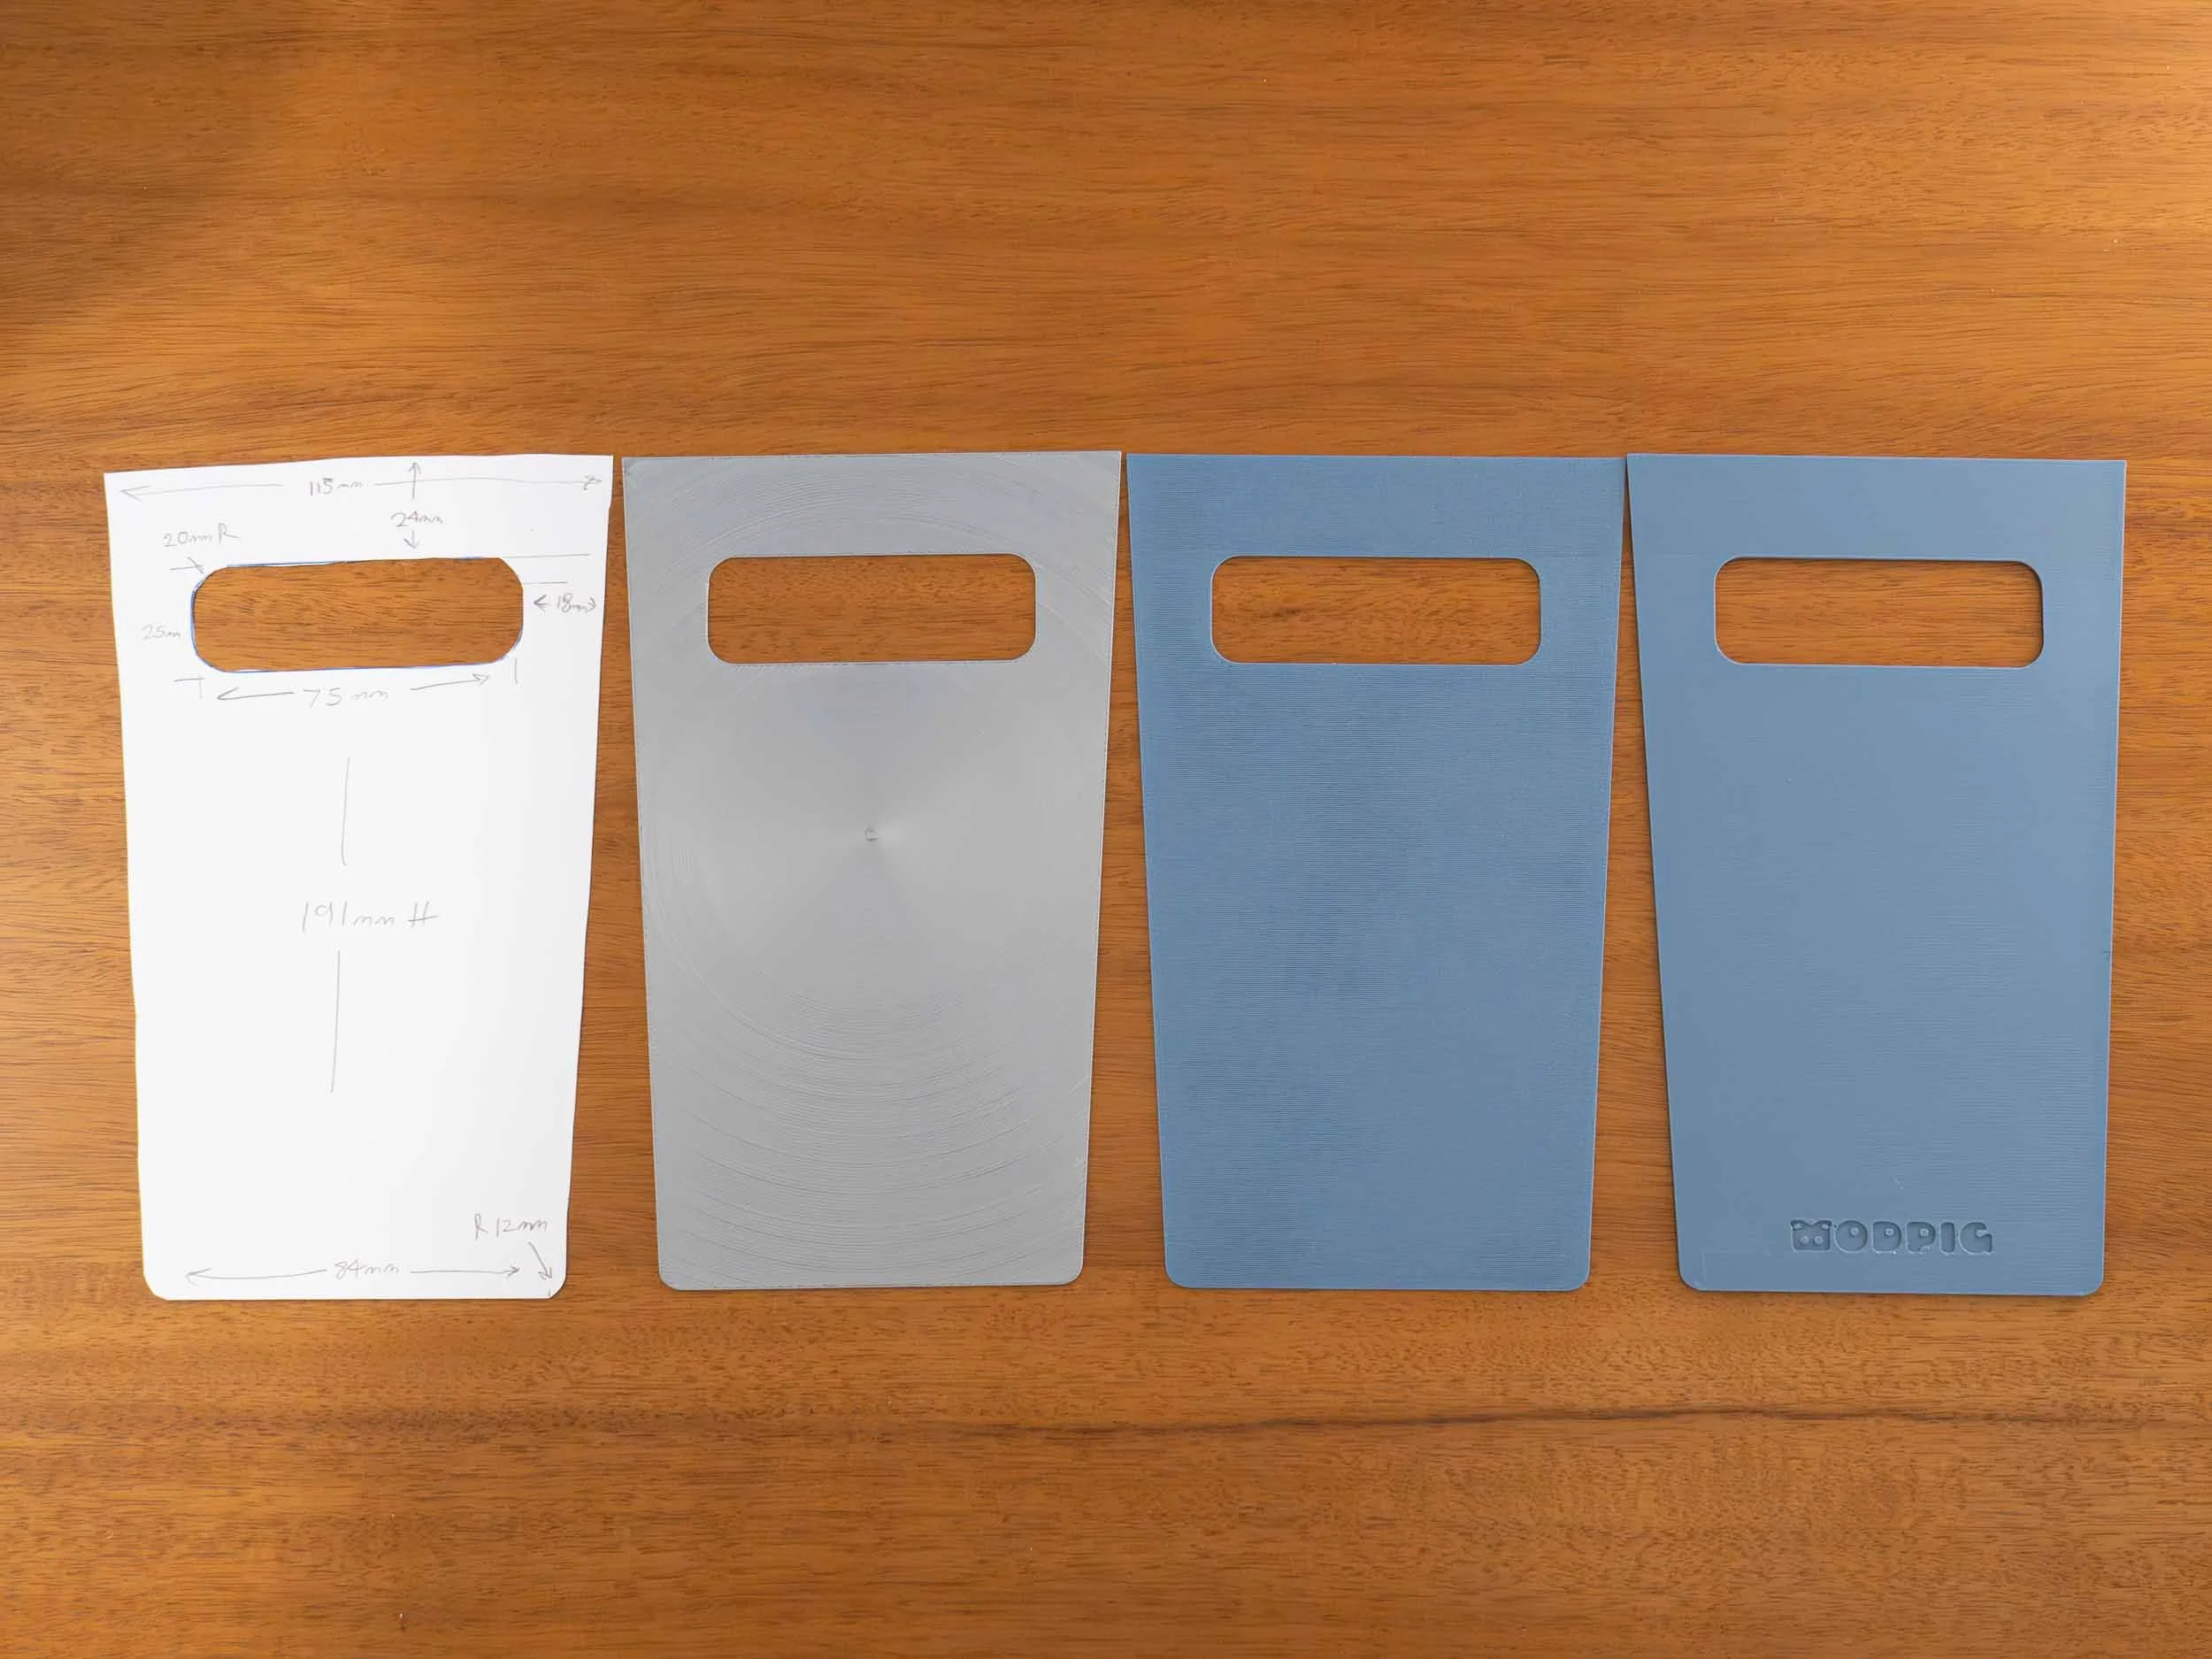
Now we have a full set of tiles using all our brand colors, and back plates in both Shop Towel and Hay. We might still play around with some different back tiles in our other brand colors, but we’re very happy with how this turned out and it was well worth spending a couple of weeks to nail down. These tiles almost make restocking pellets feel exciting!